Cynnabar's 2020 Wassail A&S Bean Count
Below are the submissions for this year's A&S bean count.
Lord Lambert won the poll for the bean count!
Entry by Mistress Rhiannon Siobhan Shynane:
My project was started at the beginning of the year. I had a friend Corasande who was supposed to be elevated to the order of the Pelican at BWTA. I was going to make her a Pelican medallion. But then everything got put on hold because of Covid and I just left it sitting.
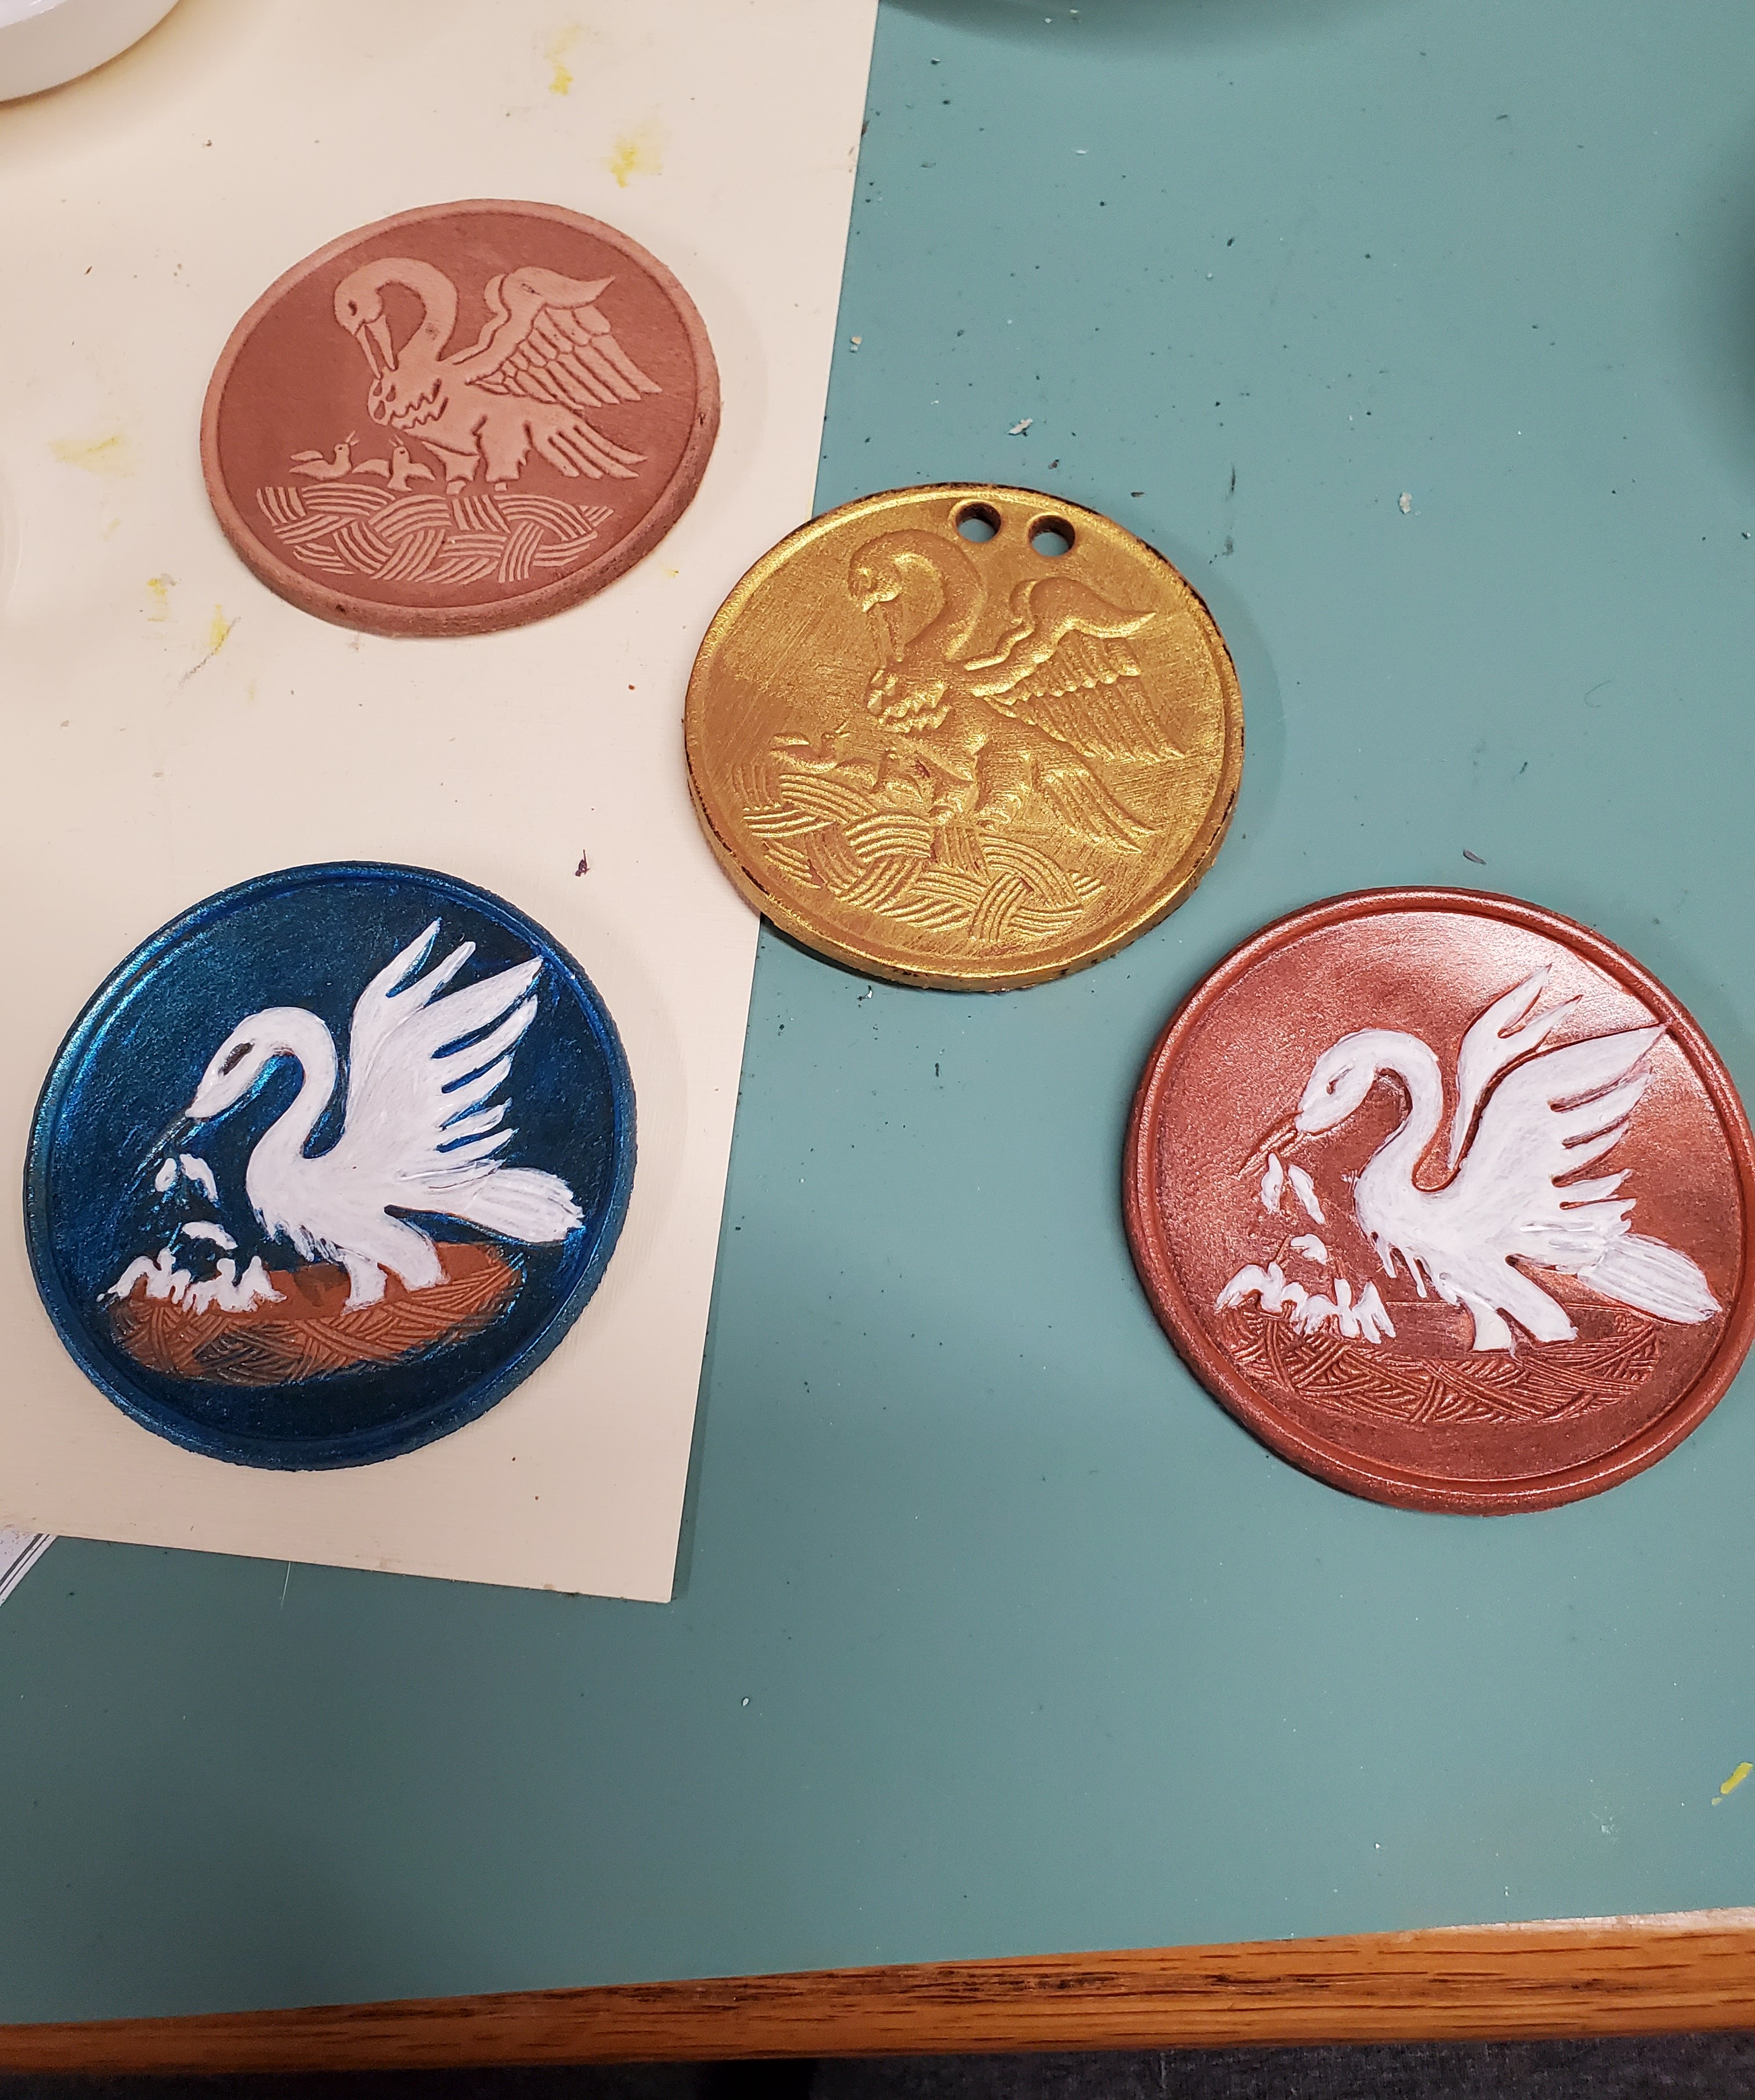
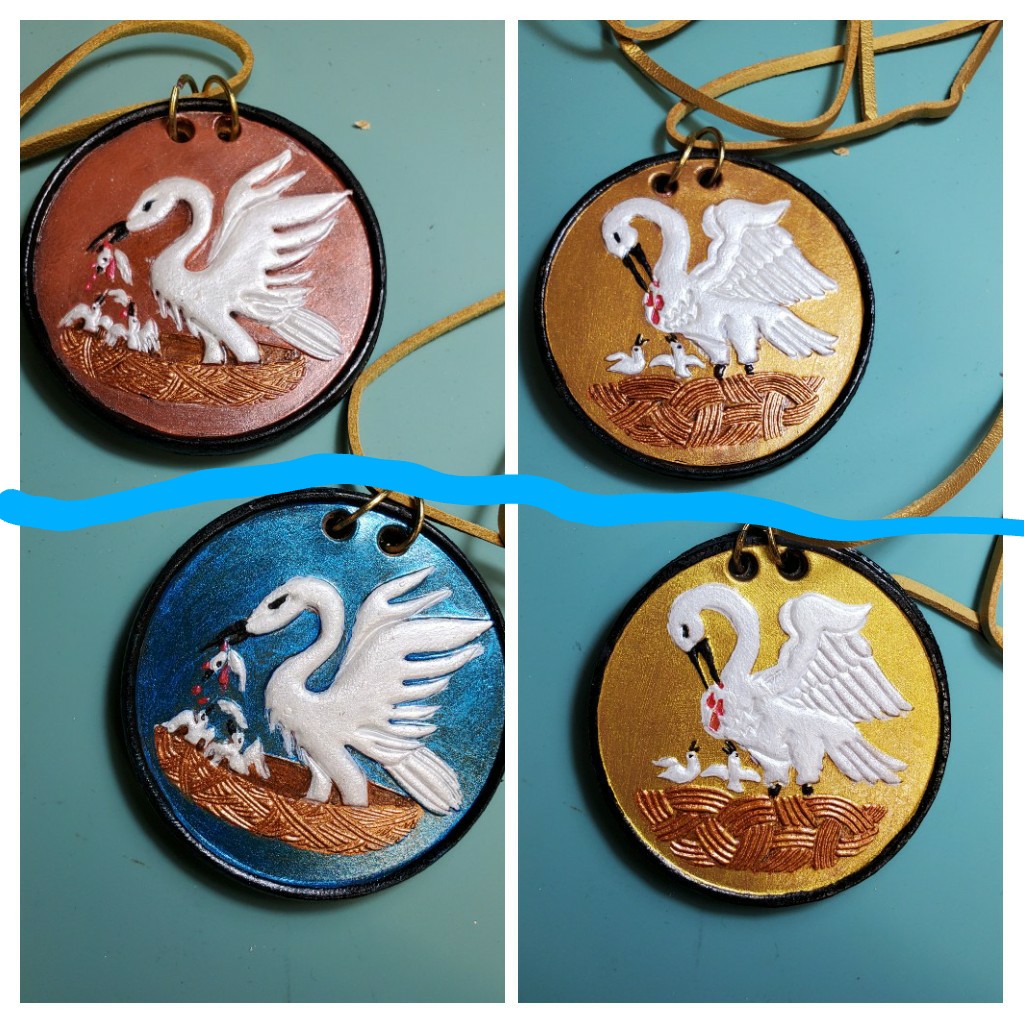
I've always wanted to do a reversible medallion for myself with a regular Pelican symbol on one side and the evil Pelican on the reverse biting the heads off the chick's, so you could just flip it over depending on the day. I decided to make one for my friend and do both at the same time. The one picture is where I left them in progress earlier in the year. I bought the disks prestamped from a friend. I painted them, sealed them, glued them together and set them up for hanging. The two images on top are both sides of my friends medallion and the two images on the bottom are my medallion.
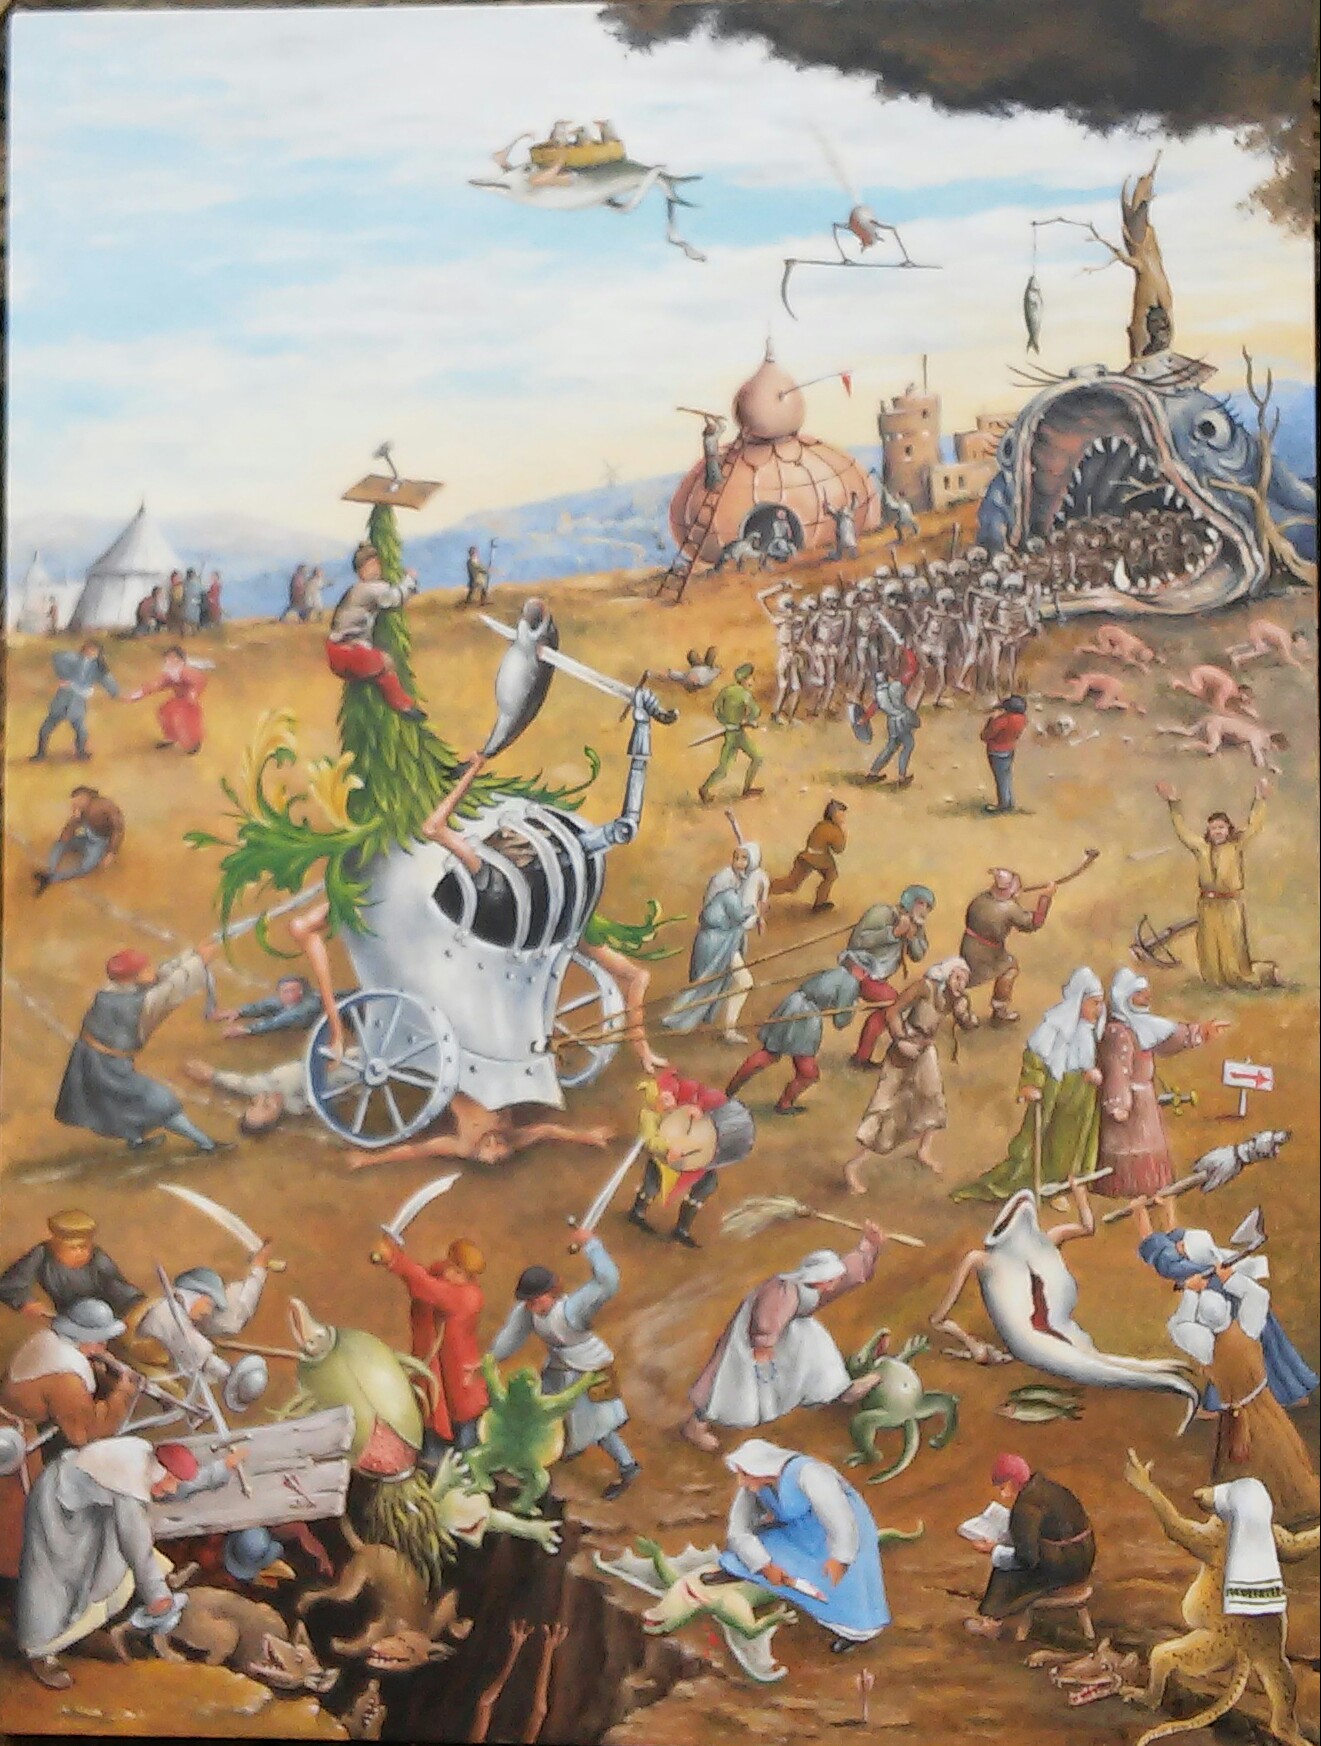
Entry by Lord Lambert Beckford:
Middle panel of a triptych "Anno Societates LV" oil paint on wood 18" x 24"
Entry by Lady Úlfrún Barefooted:
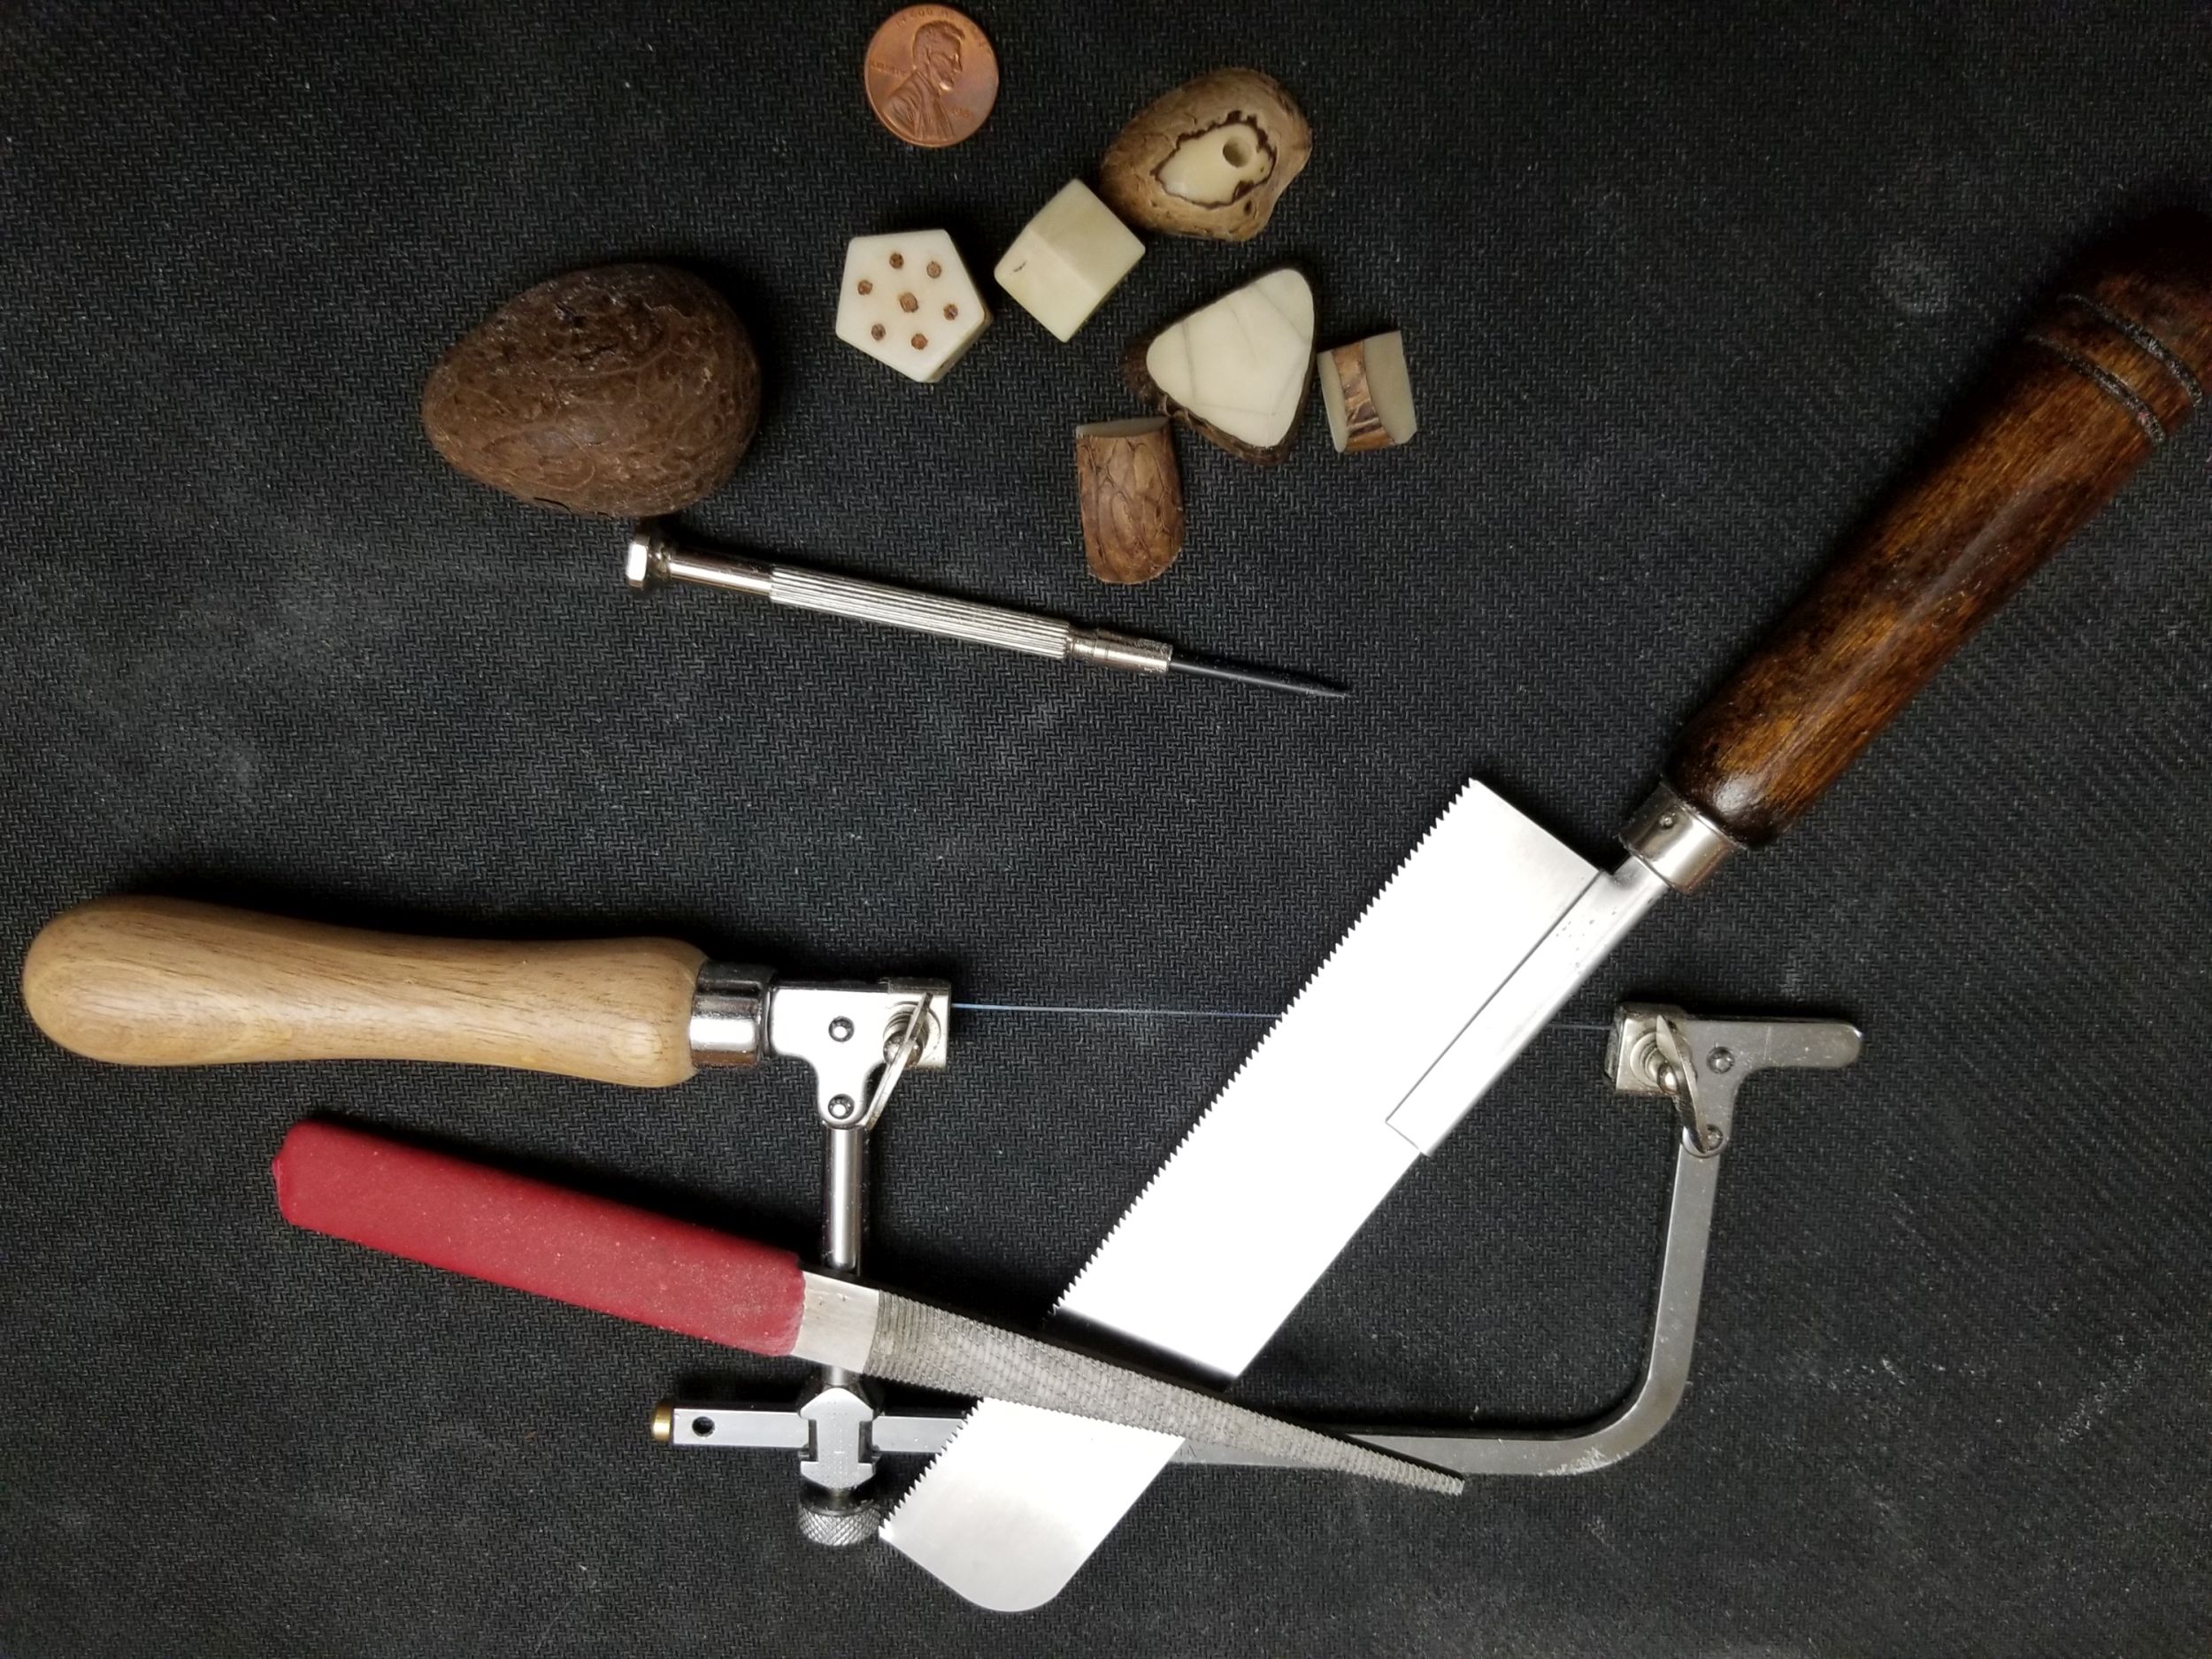
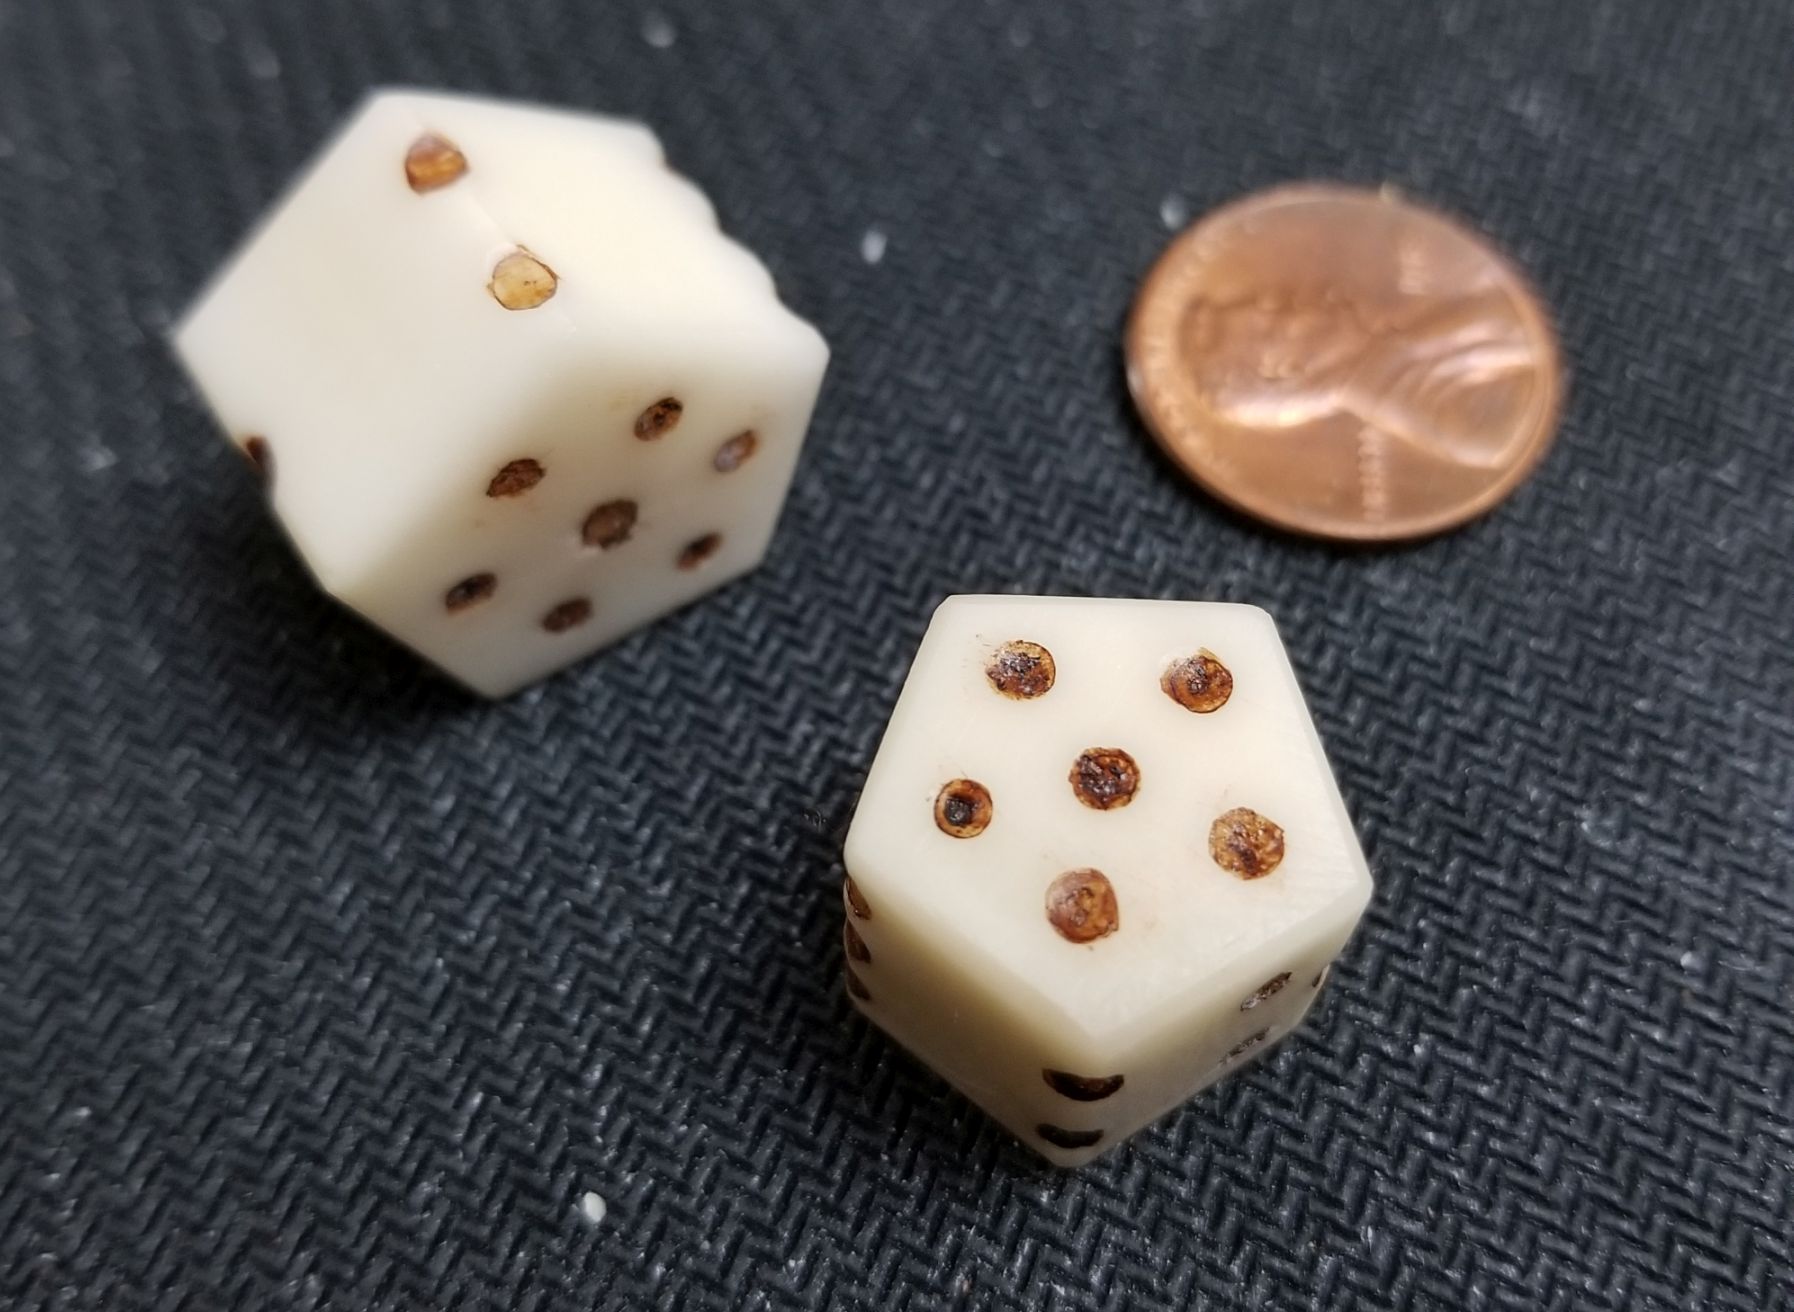
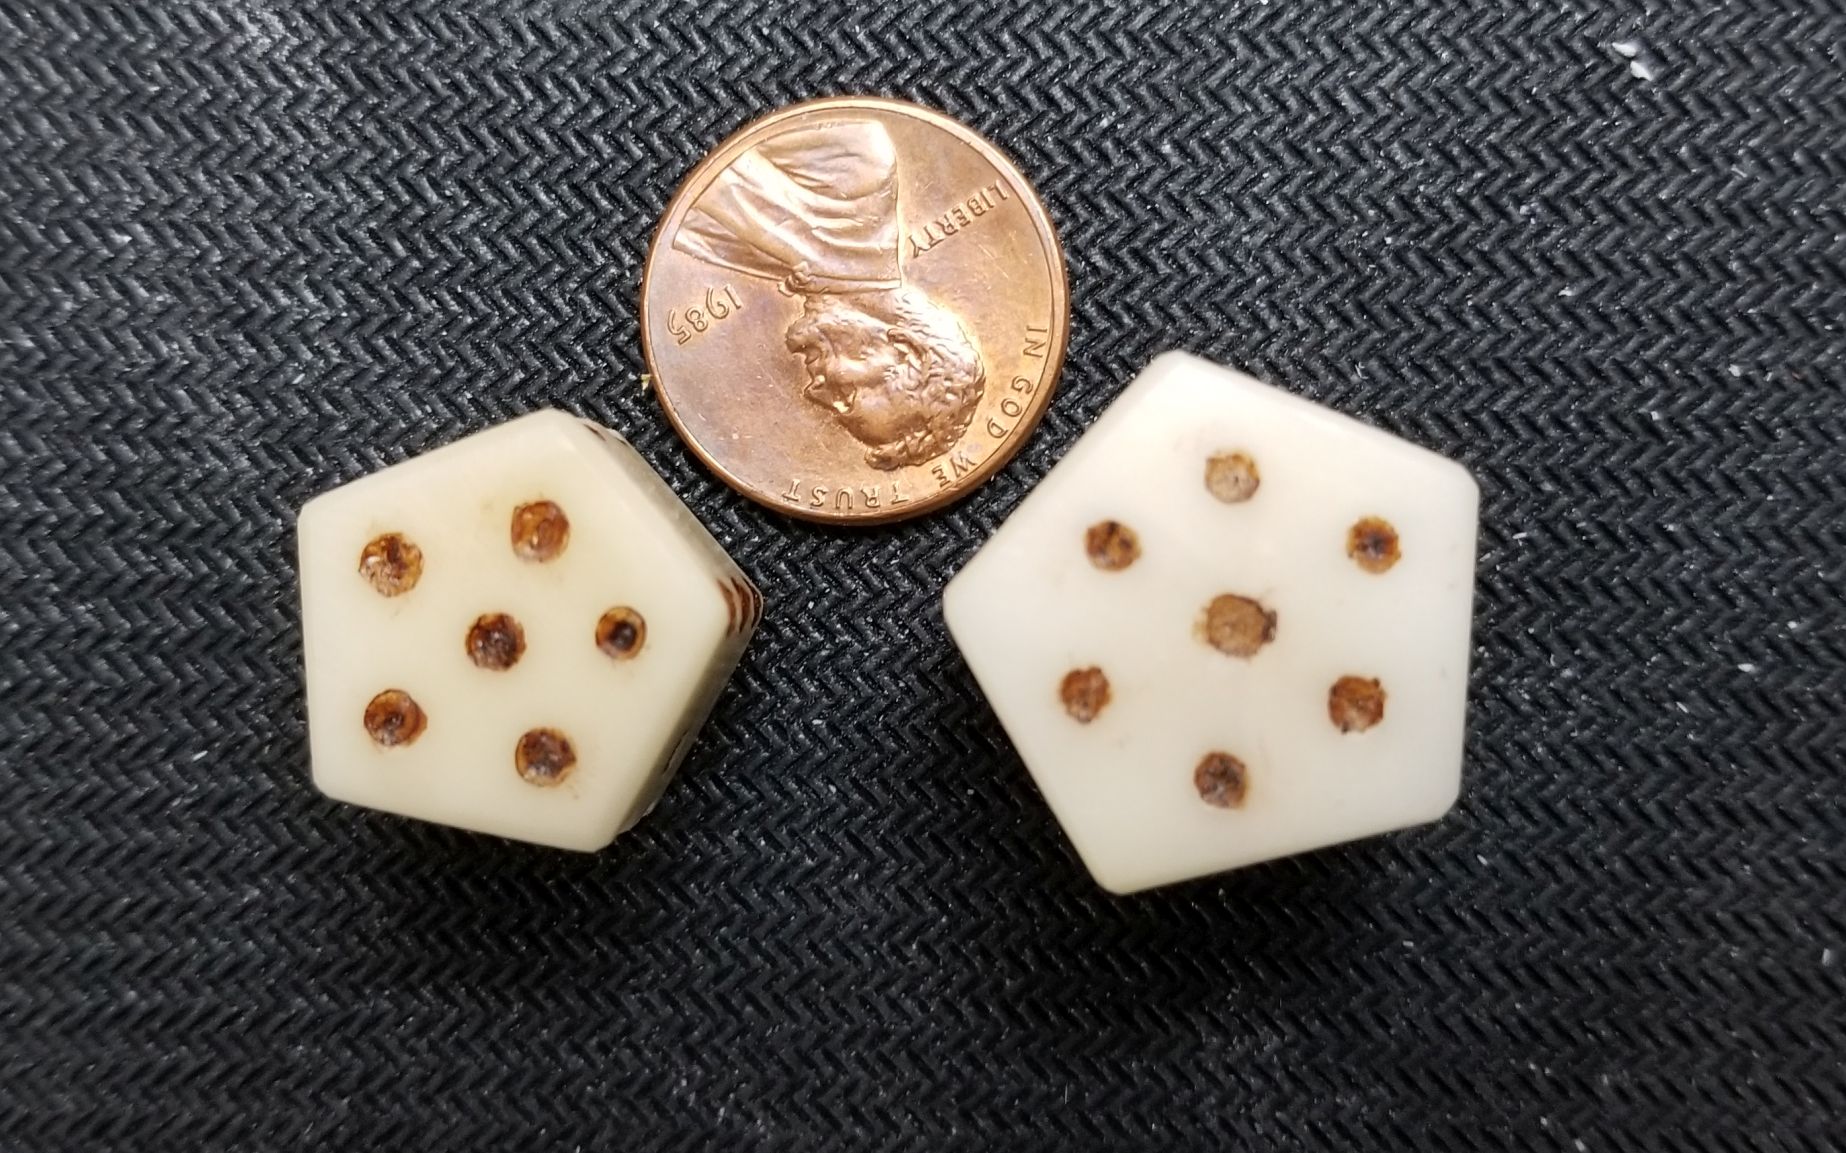
Hand cut and carved 7 sided tagua nut dice for use in the game of Astronomical Tables. The tagua nut was chosen as a reasonable replacement for ivory and the game is described in the 13th century manuscript Libro de los Juegos.
These were started at least a year ago at the request of Lady Ceara and completed last week.
Entry by Mistress Fionna:
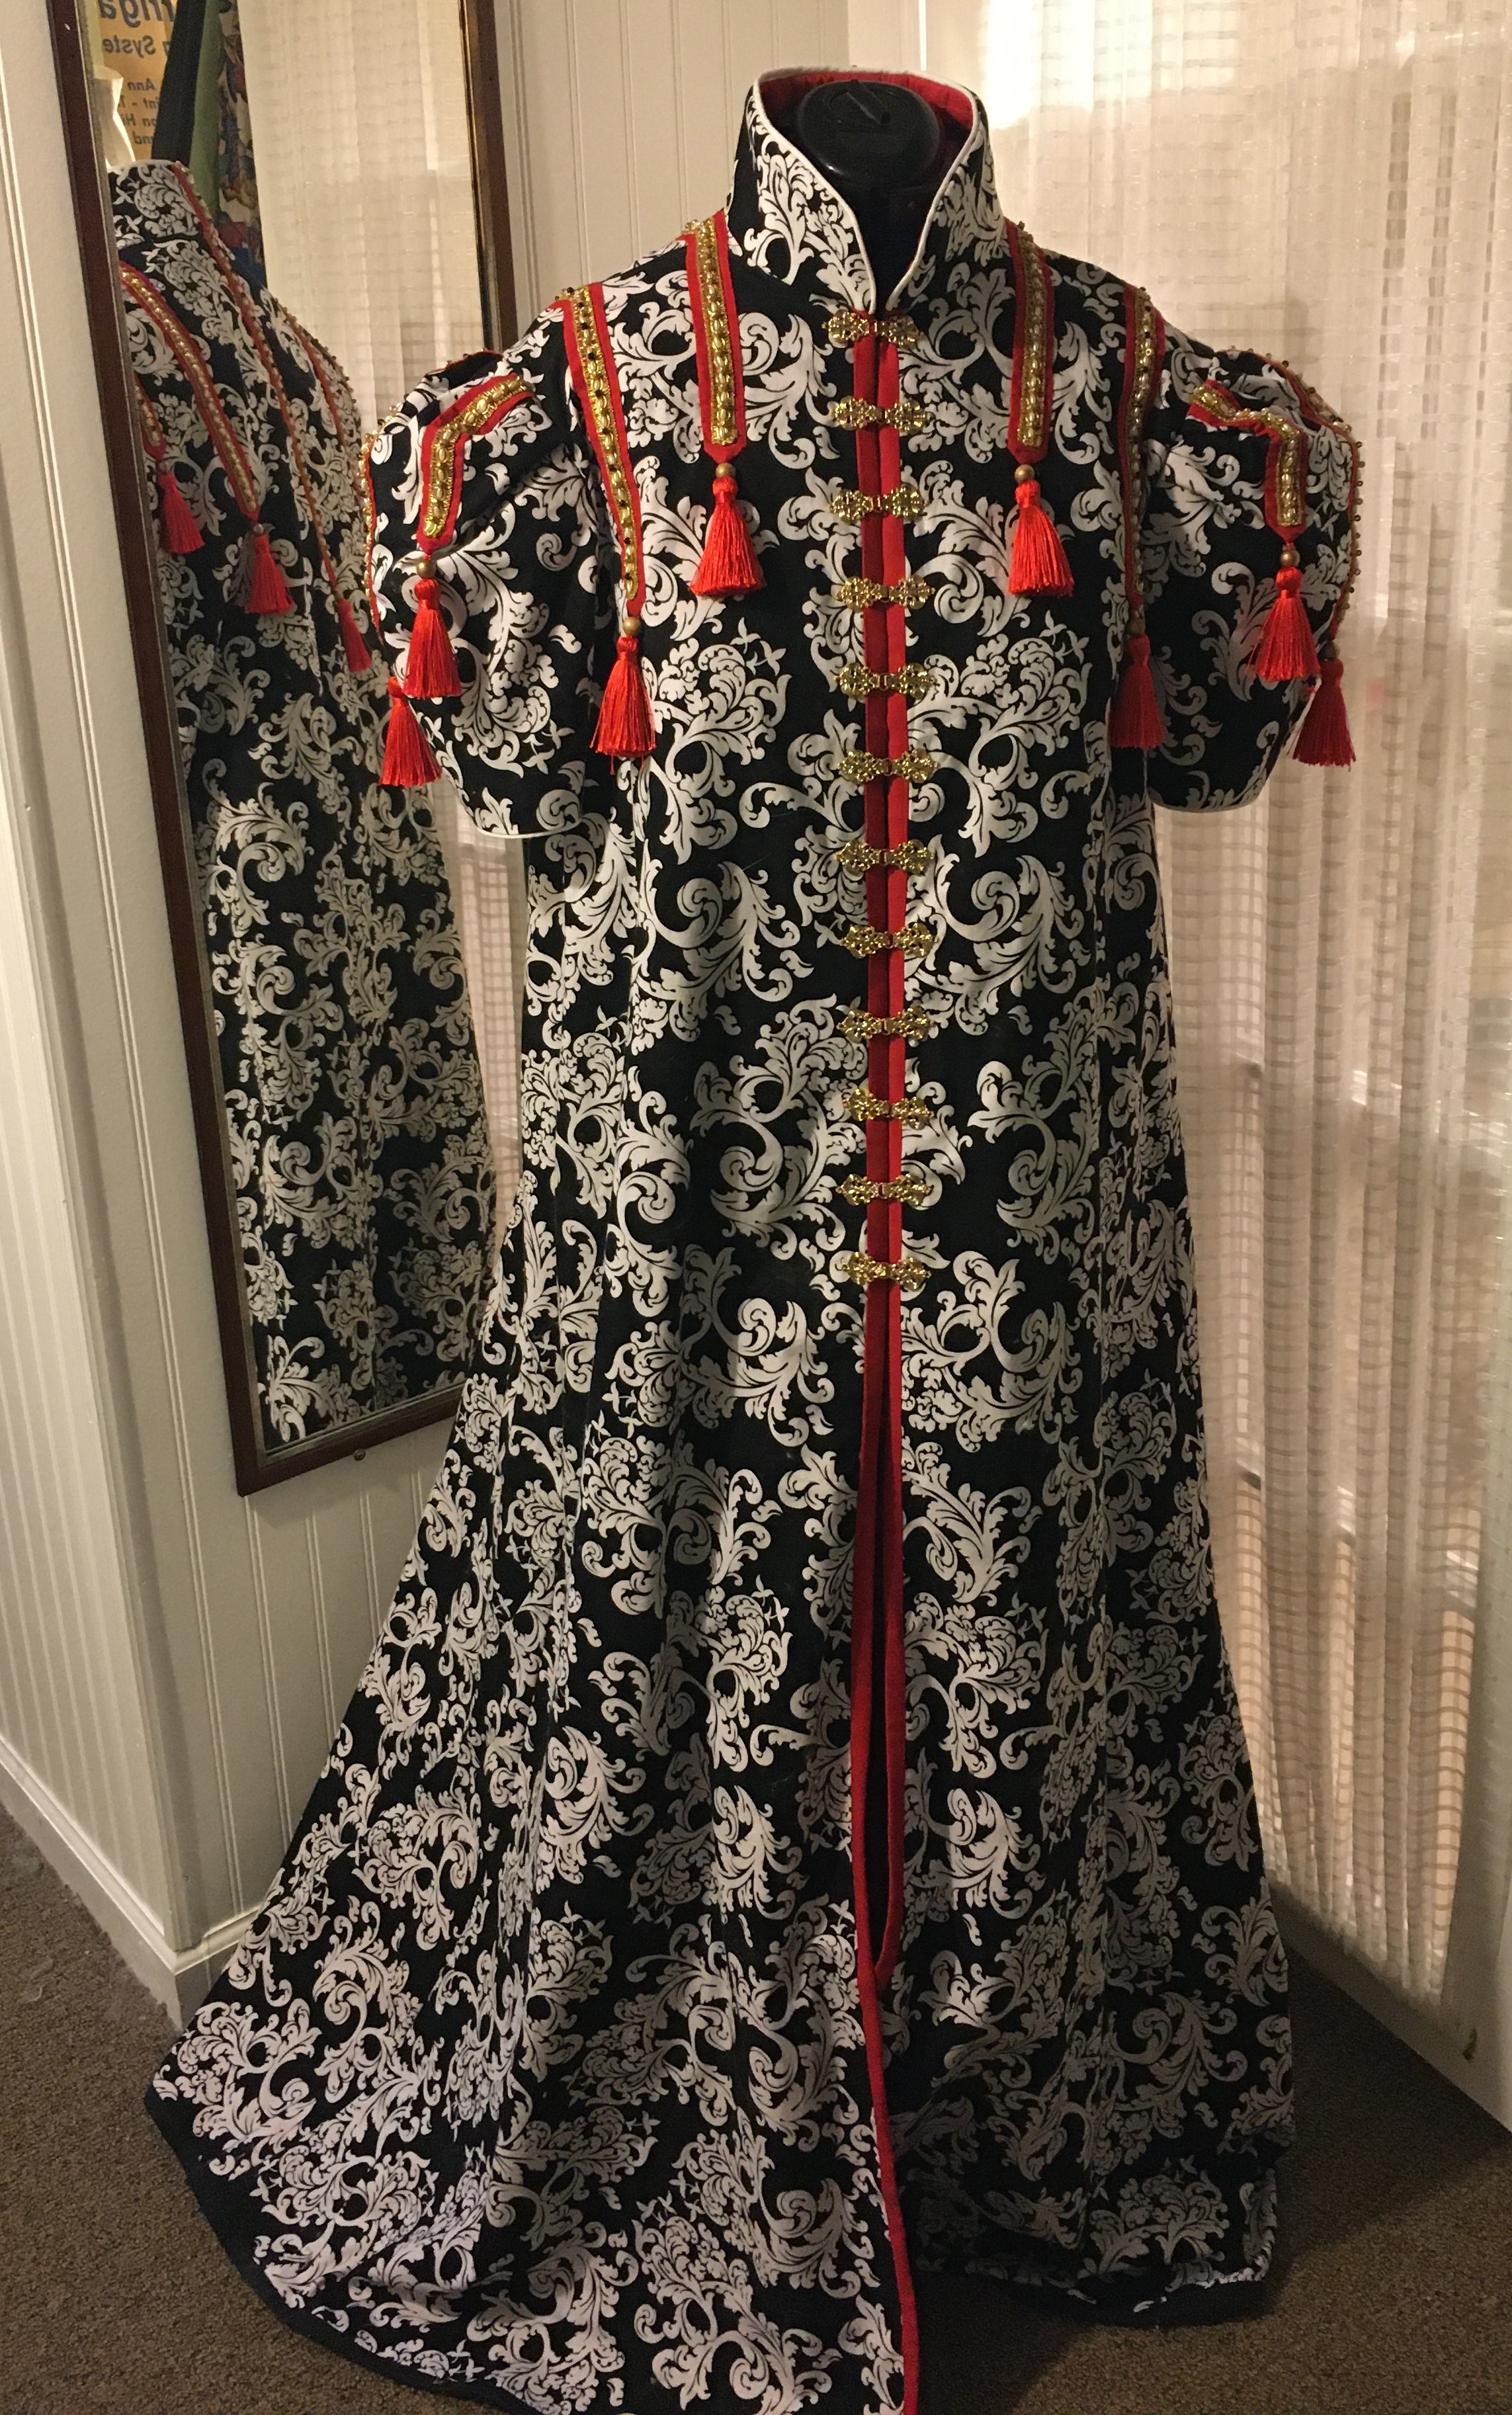
Entry by Baron Malachy:
I found this pattern before our investiture in 2019 and warped it up in October with some hope of making something from it for that day. Upon trying to execute the pattern, I found that I didn't understand the instructions and due to the many distractions set it aside for later. I picked it up as my Unfinished Object project this month, found a few videos that explained the process and was able to start making progress on it. As of this writing, it's about 1/3 done. A single pass of the pattern takes a little over two hours.
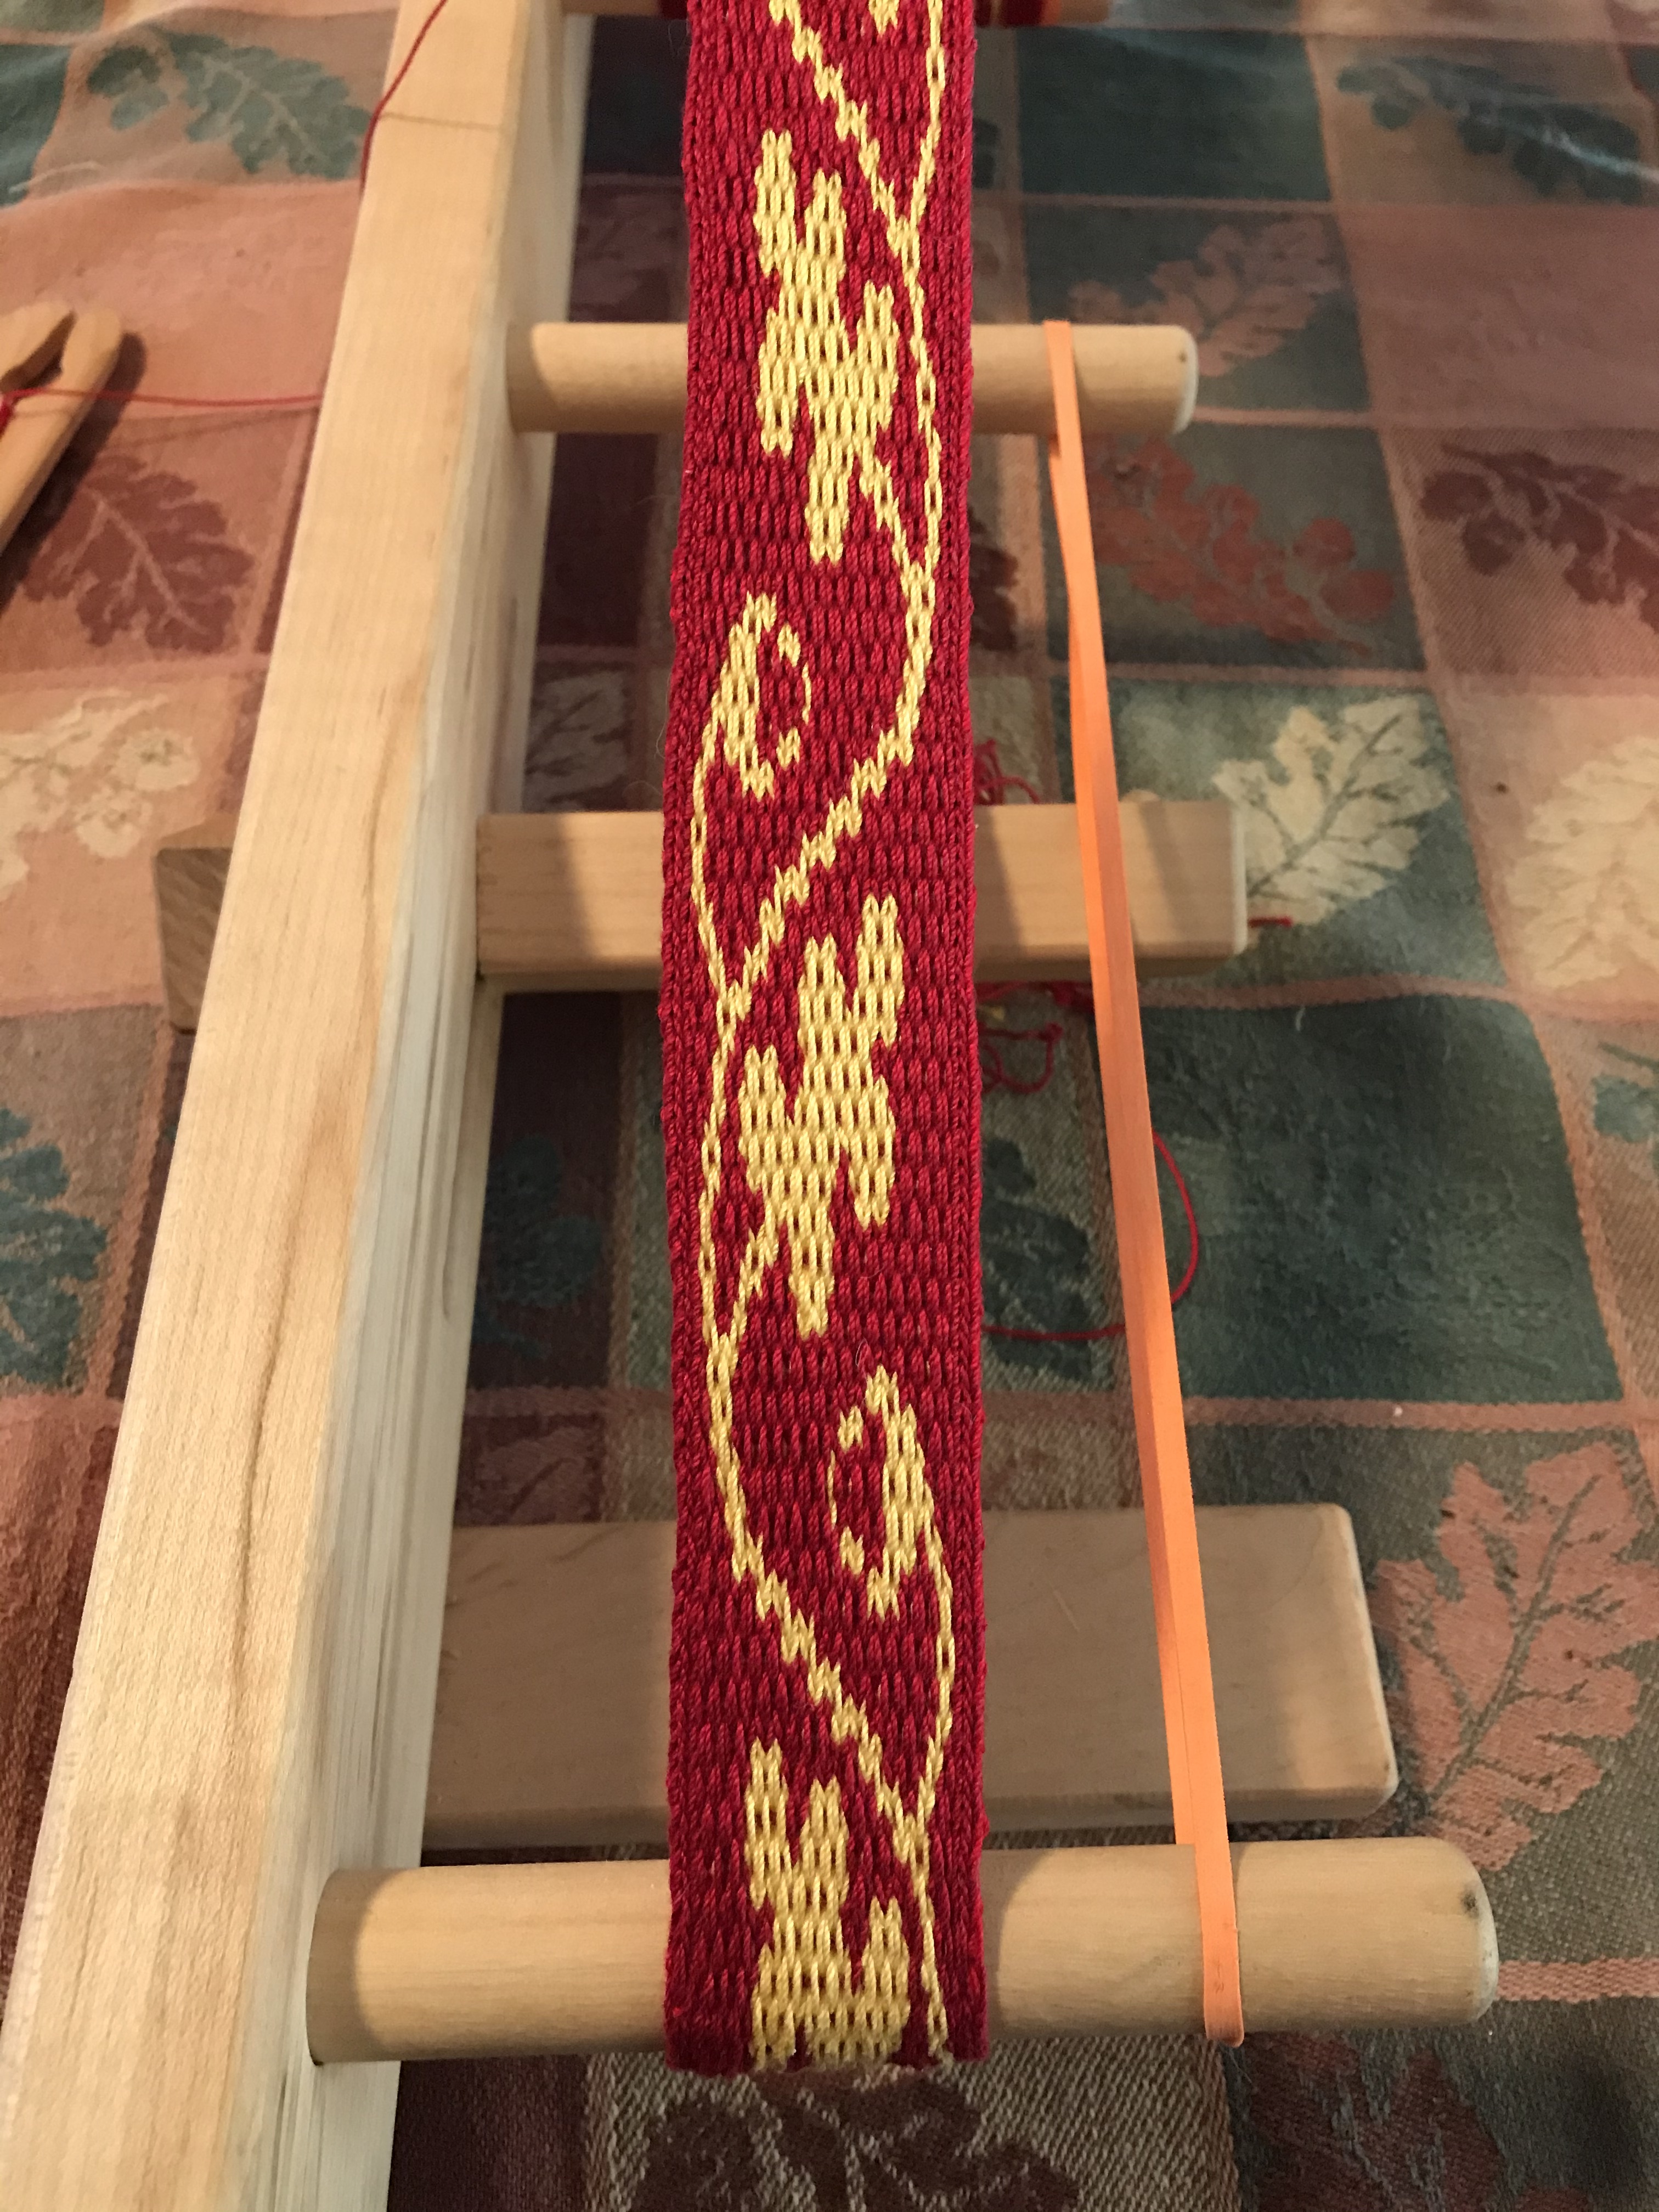
I'd learned basic inkle weaving techniques from our fiber artisans in Cynnabar when we last had our fiber fair some years back. I've had erratic time to progress on my techniques and have mostly done basic patterns in card weaving since that time. My goal for this project was to use a higher end technique in order to have output that was a more interesting pattern. For inkle weaving, "pick up" is a technique that permits arbitrary patterns. Pictured here, double faced card weaving provides a mechanism that is perhaps more comfortable to me as a computer person of being able to "print" a pattern using fabric pixels.
An advantage of this technique is that it's very easy to execute. A disadvantage is that it's not quite as neat in its output as pickup weaving; see the small "dots" in the foreground color as an example of that. One pleasing element of this technique is the back side of the pattern is mirrored symmetrical to the front.
Things I've learned in this project: The basics of double faced card weaving and increased my understanding of how card turns impact the look of a given row. The "stretched" look of the pattern likely can be mitigated by using a finer weft thread for the pattern. And also, don't leave projects on your inkle loom under tension for most of a year. I'll likely have to replace my loom because of the cracking that caused.
Link to pattern on StringCrafter
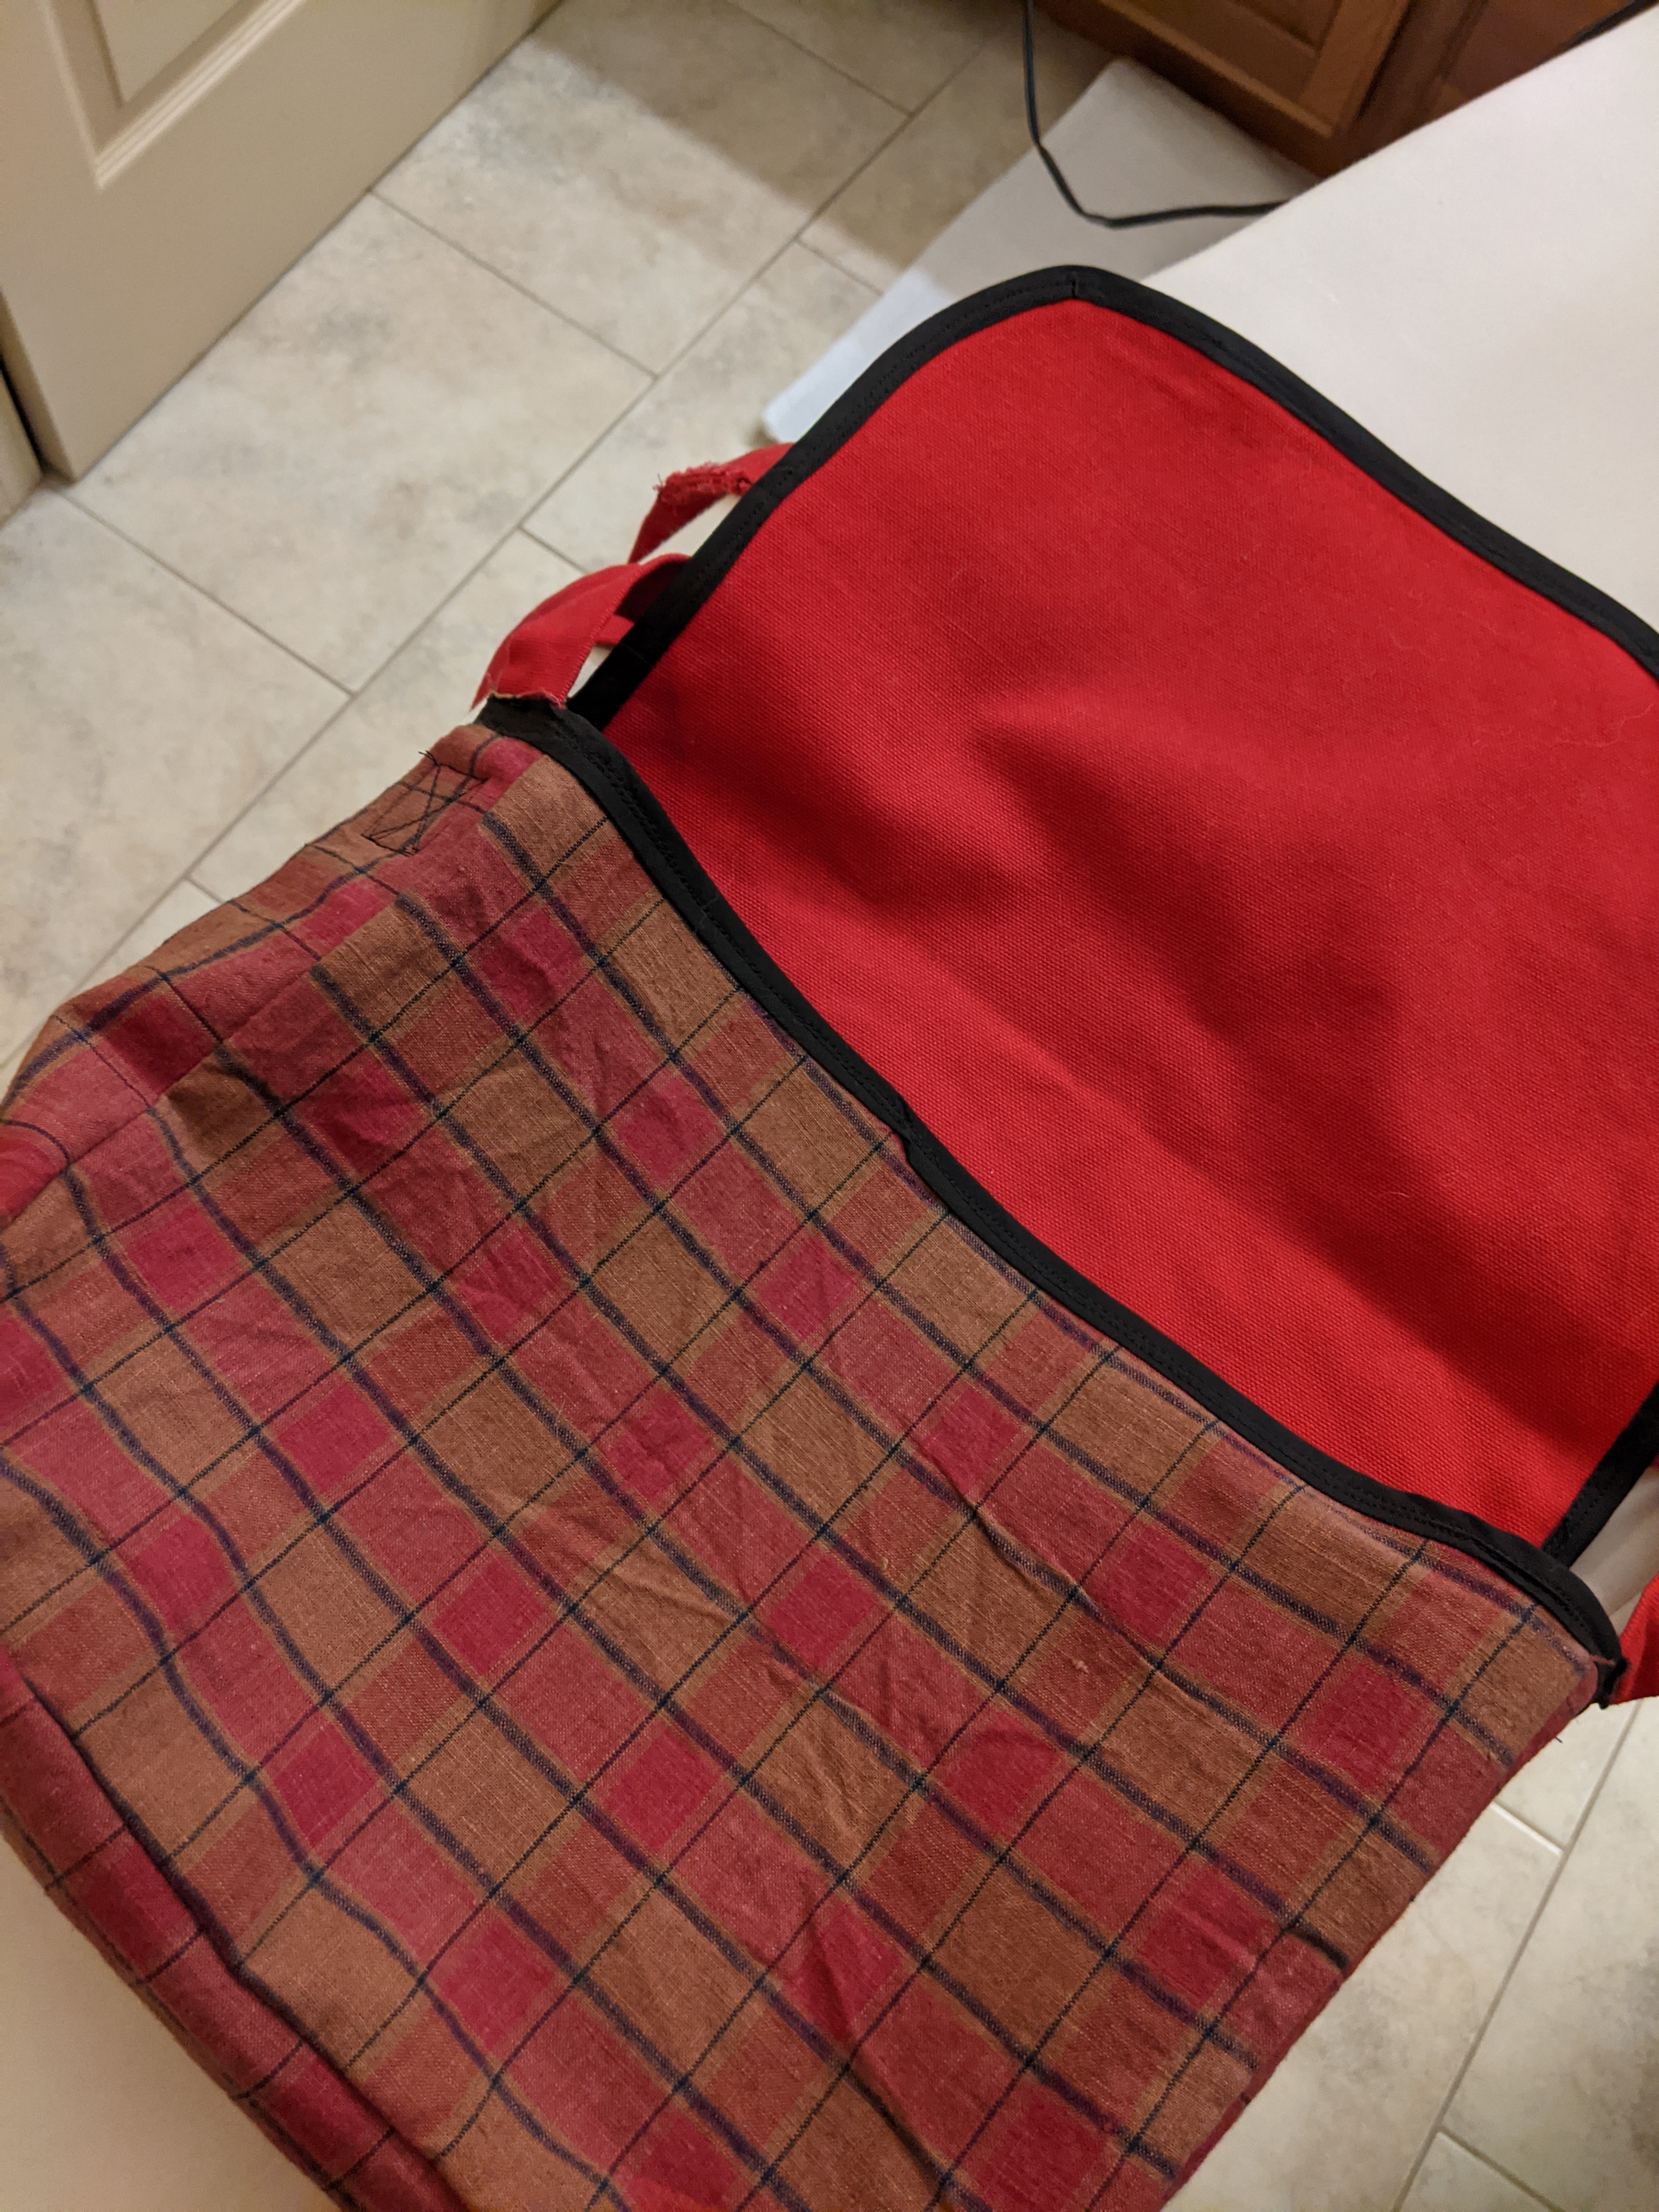
Entry from Baron Óláfr:
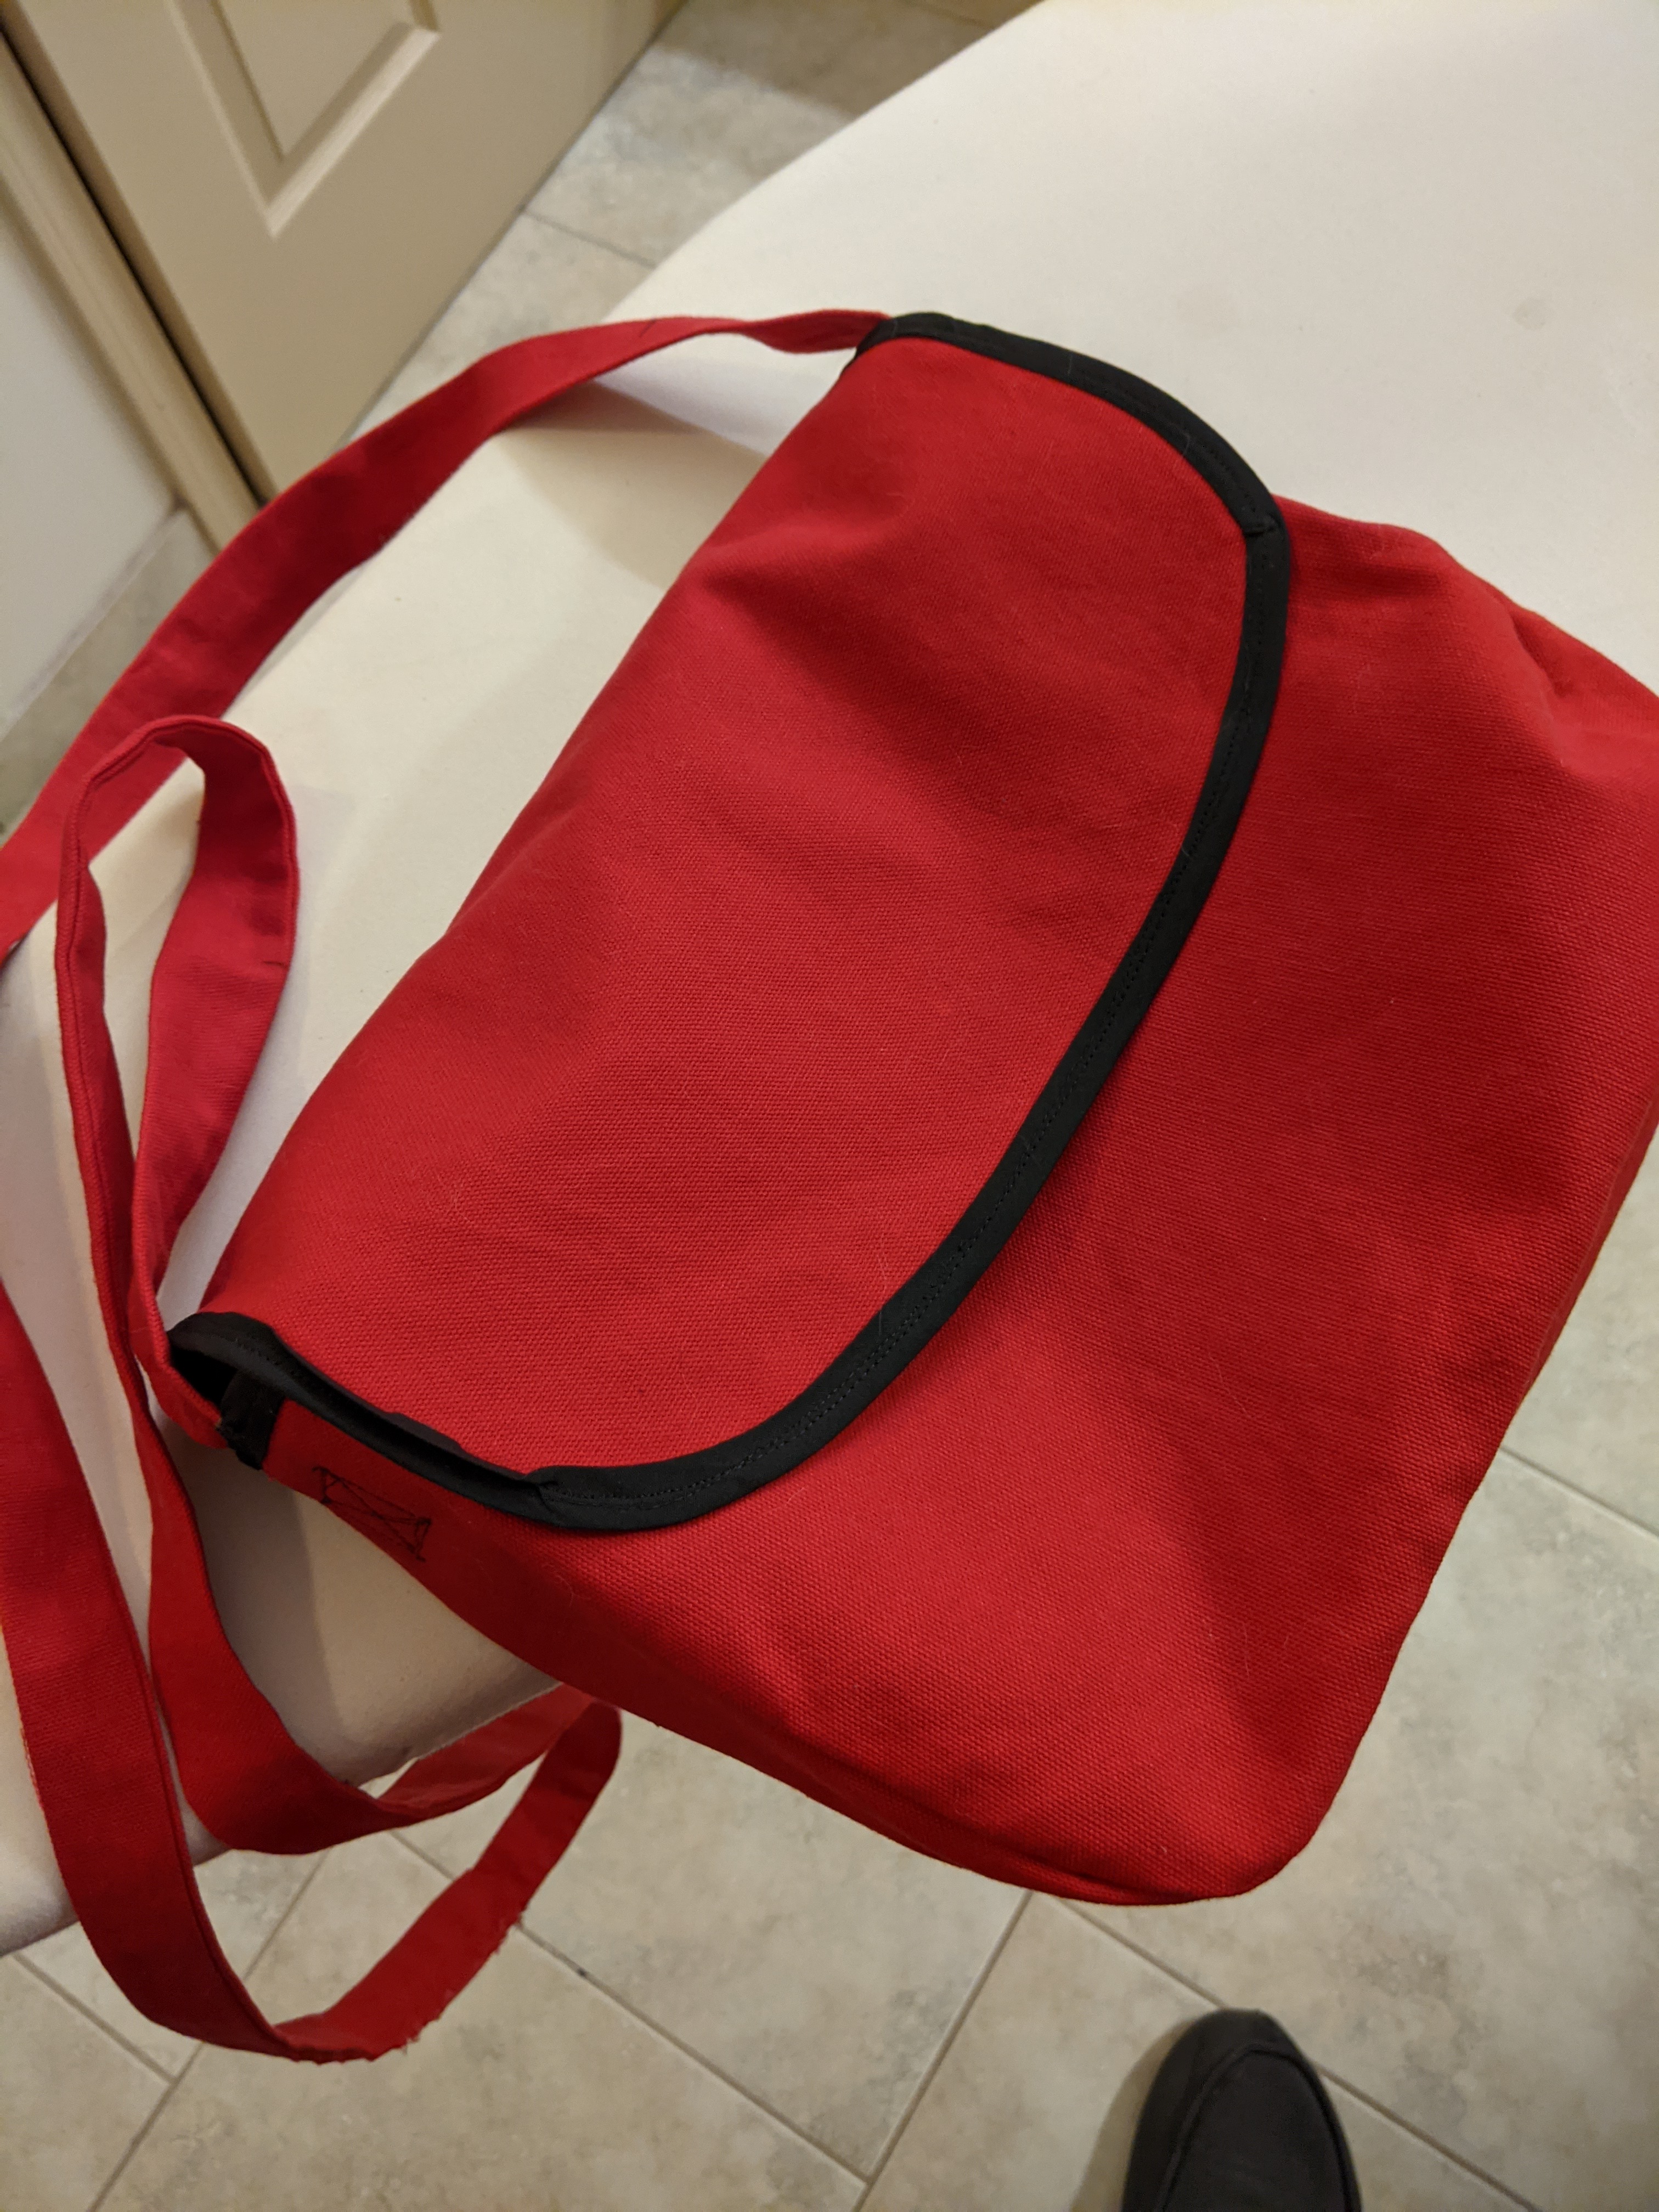
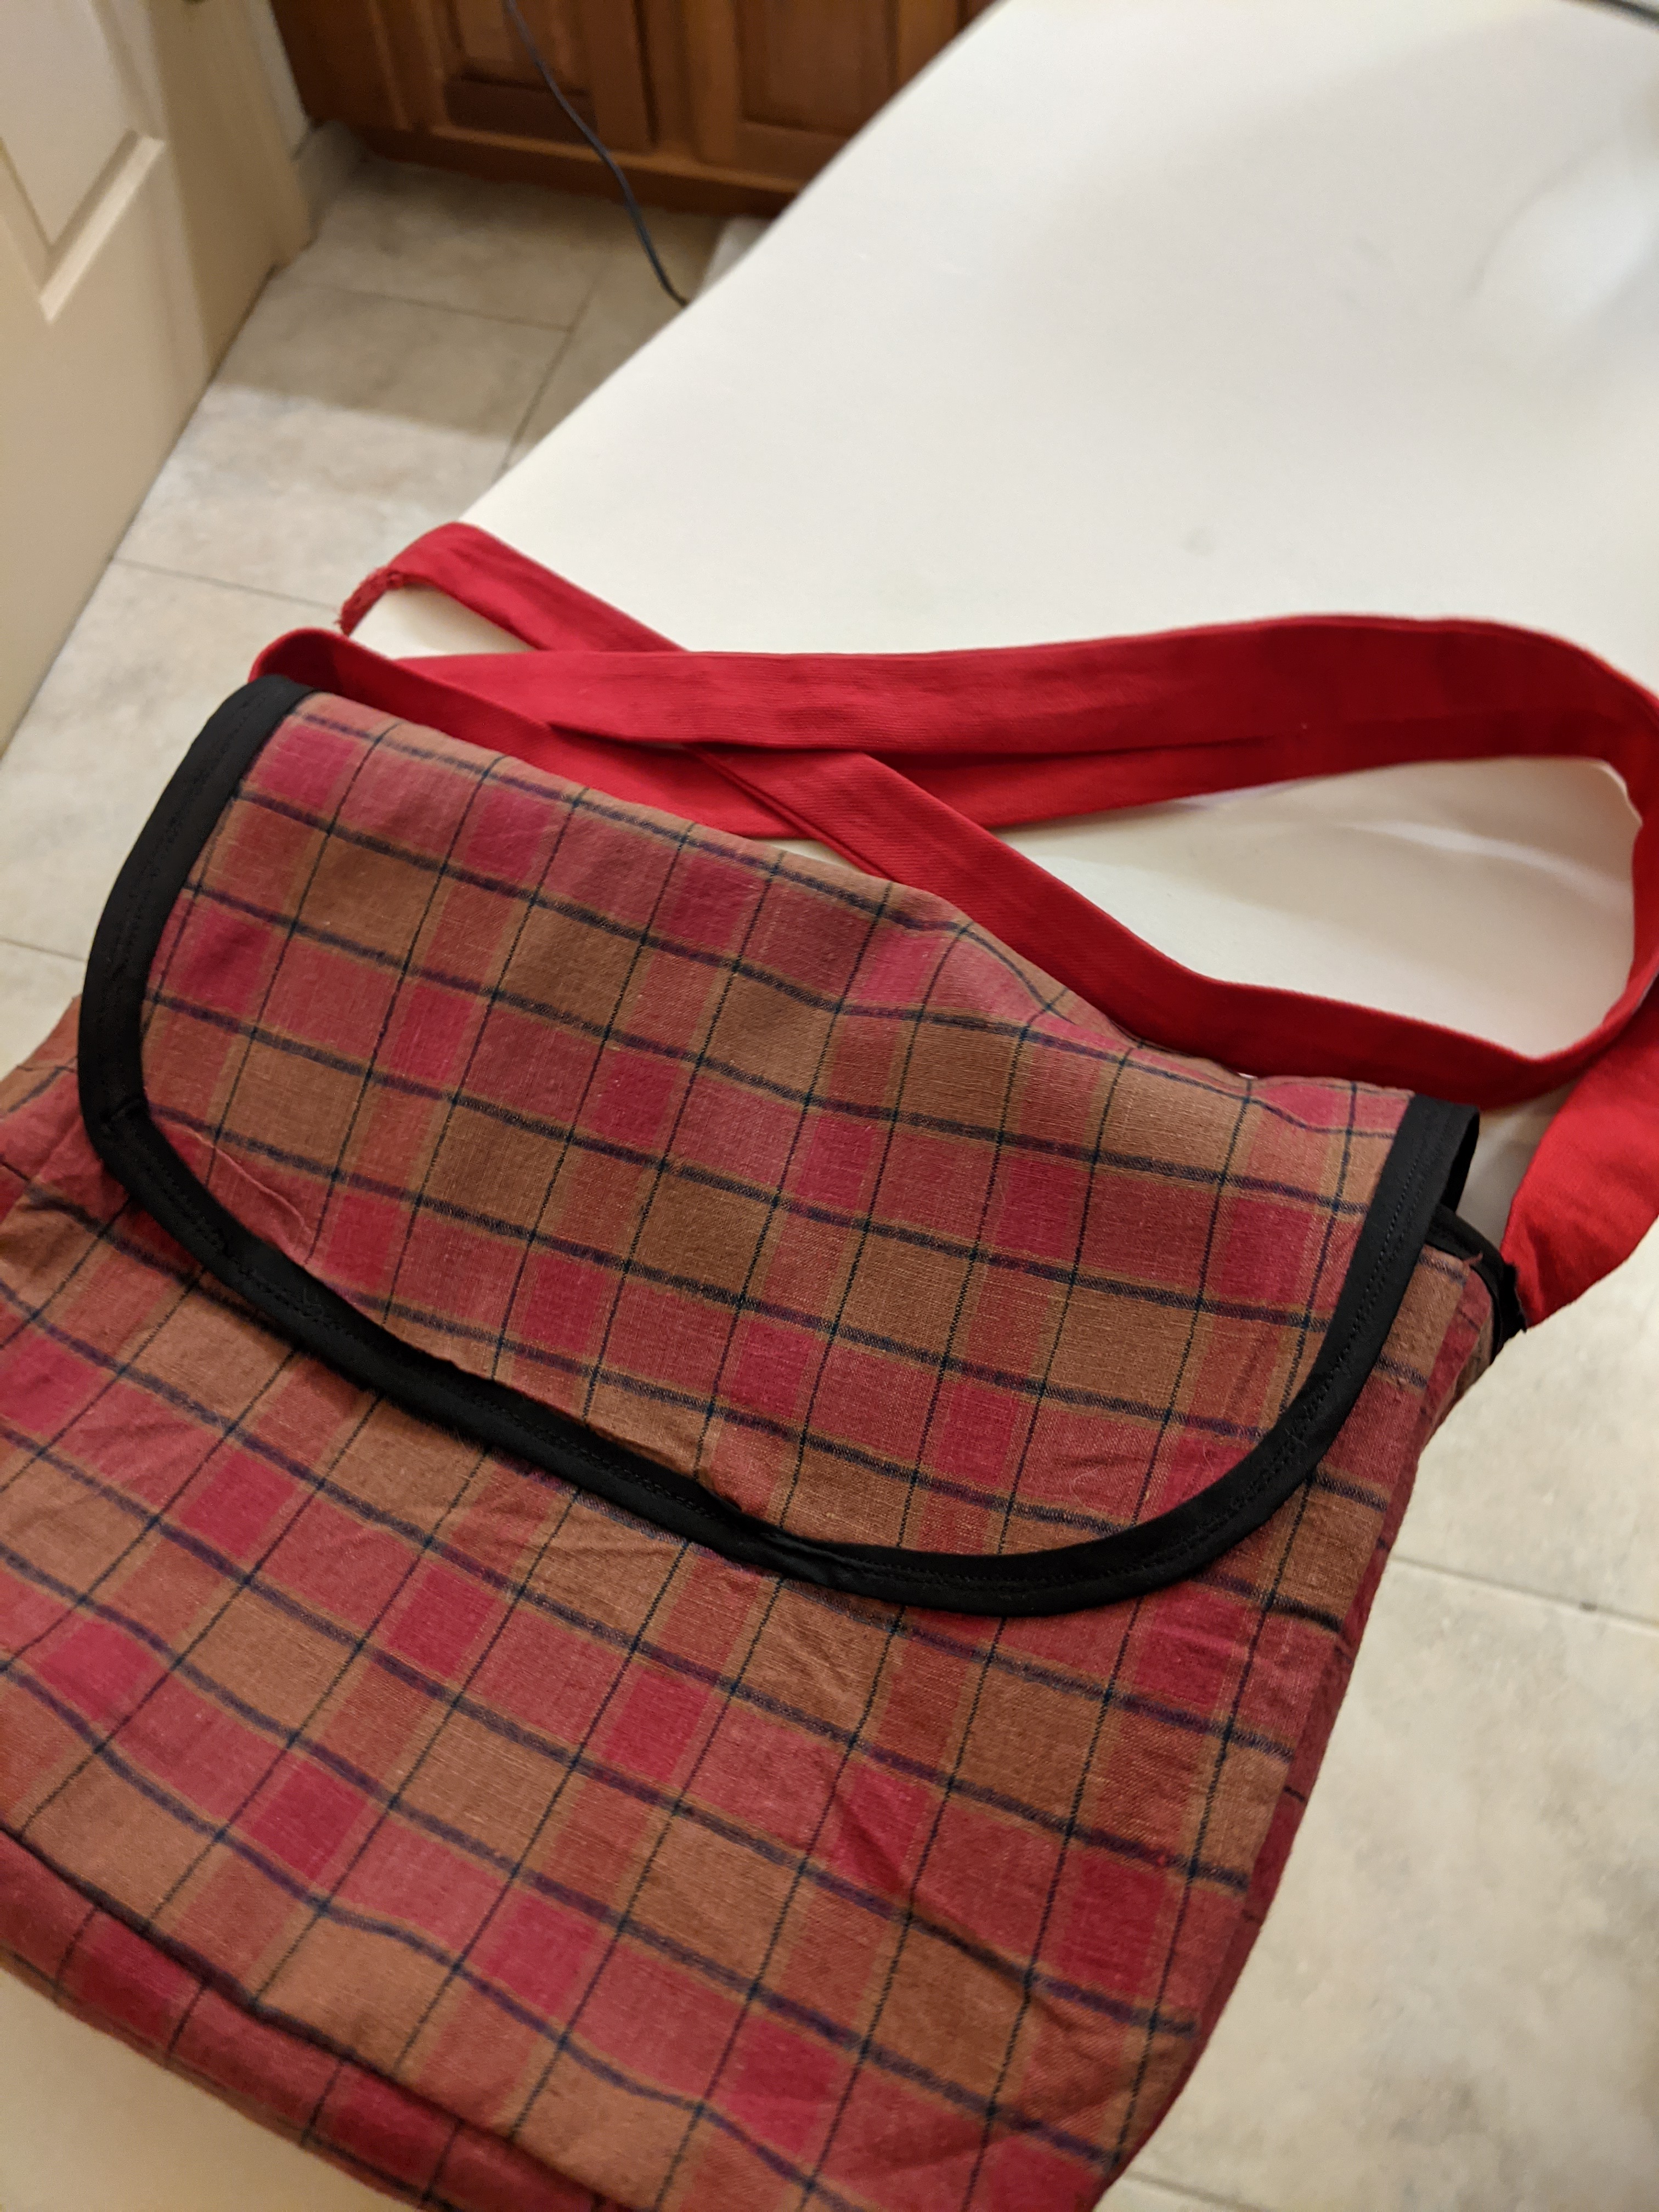
"Lady Caryn taught a class for the Barony about making "Pennsic Bags," and sadly, I lost momentum on getting it finished and subsequently had a clipped-together pile of scraps lurking by the sewing machine.
It was pieced together out of scraps of red duck and red-and-black plaid linen from other projects, and I added black bias tape as a finishing step to "Cynnabar it up". I made the strap extra long so I could tie it into a pull-knot as the length adjustment technique based on how I wanted to wear it on a given date (shoulder or cross-body).
I'm really proud of the fact that I managed to get it to be properly reversible!"
Entry from Lady Ysoria Fletcher
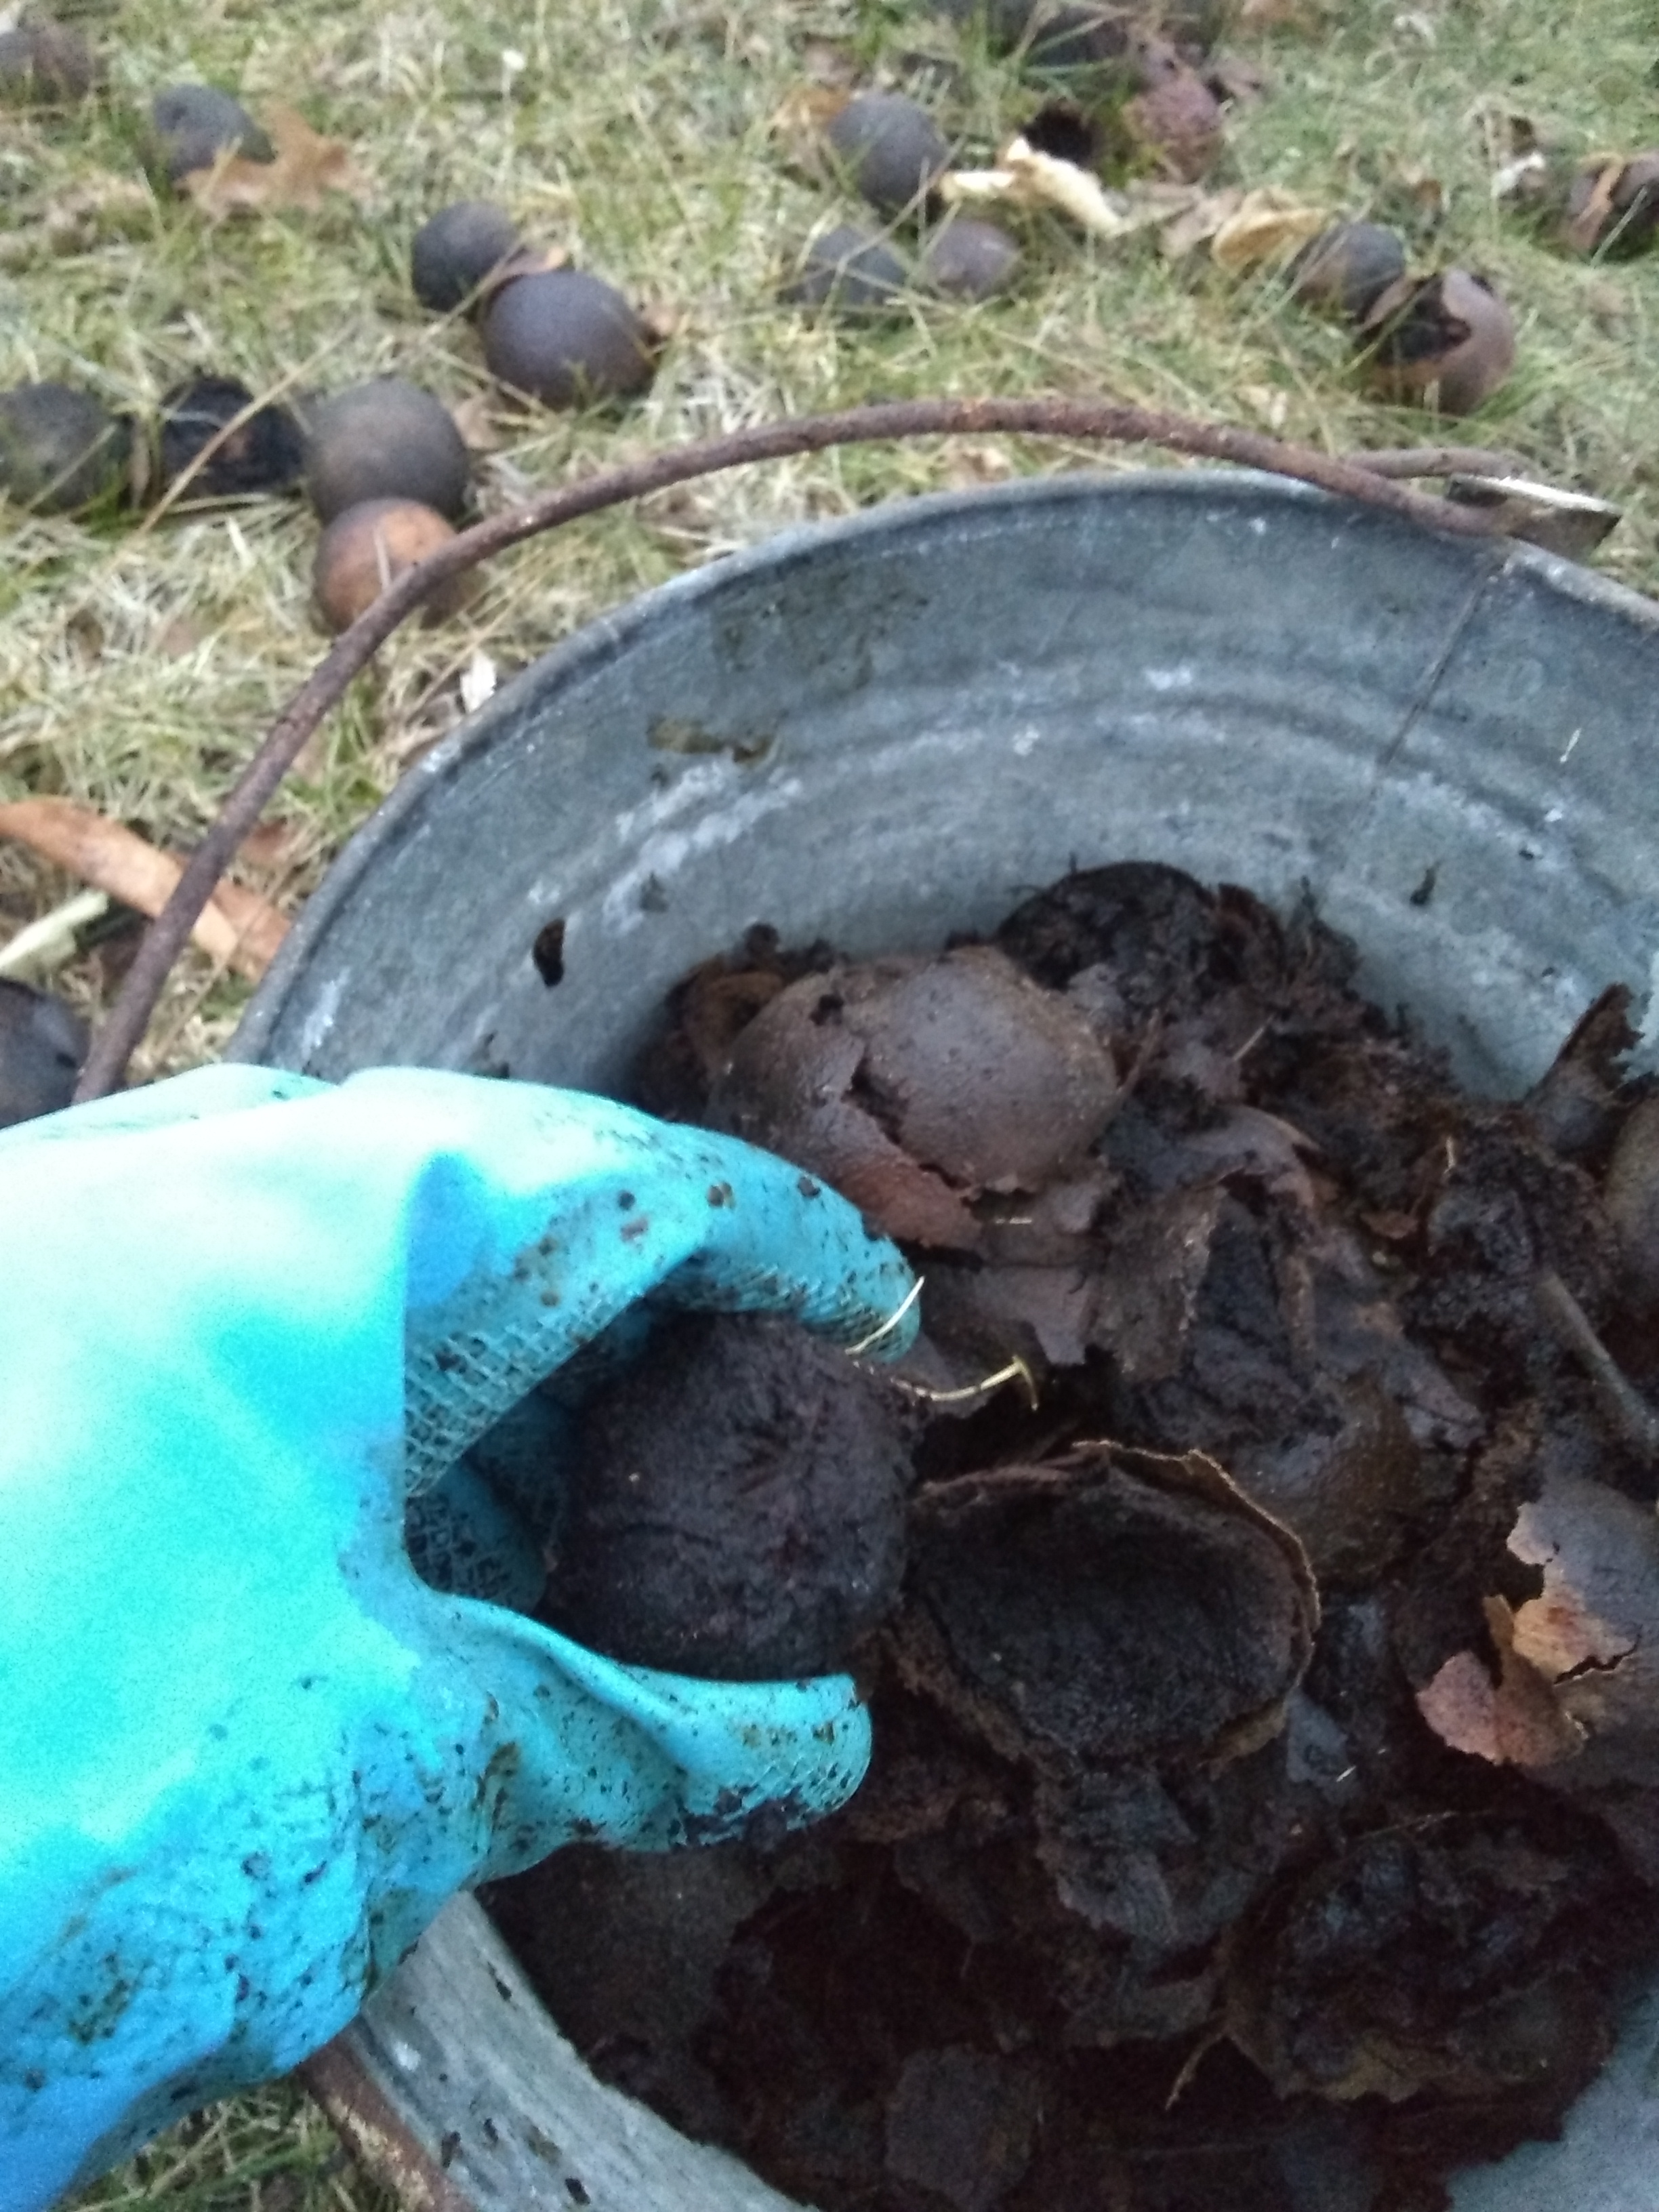
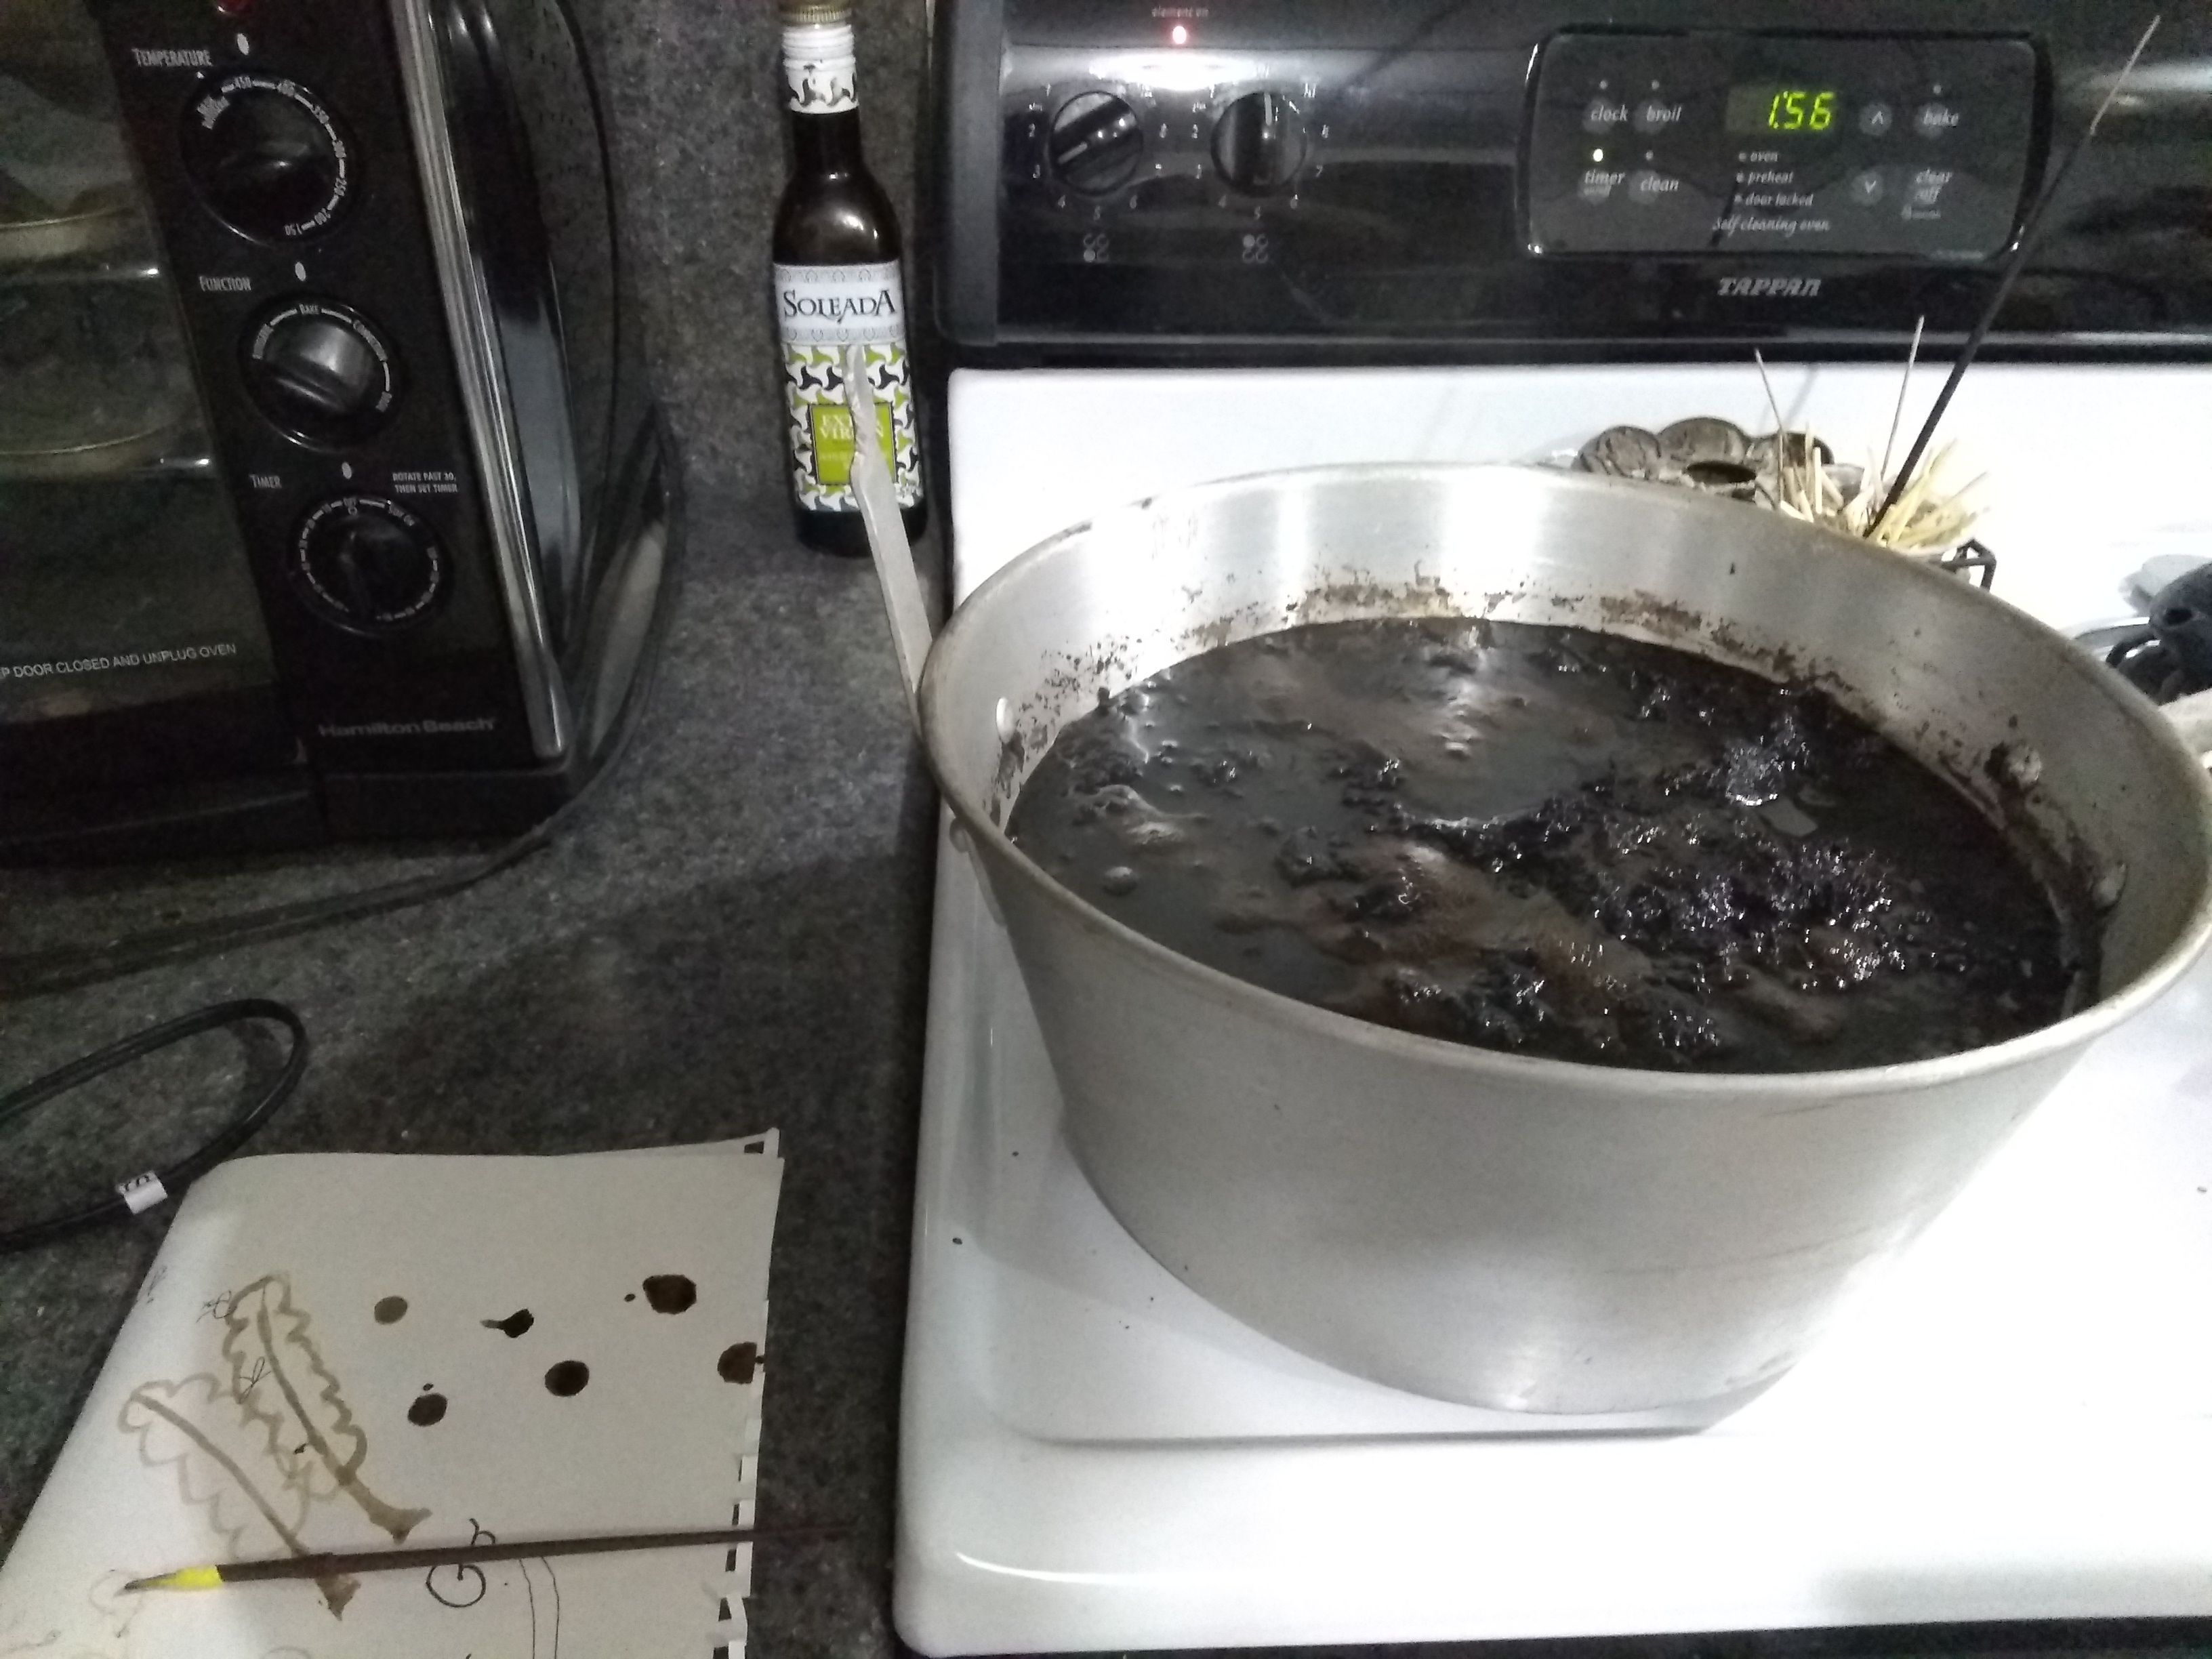
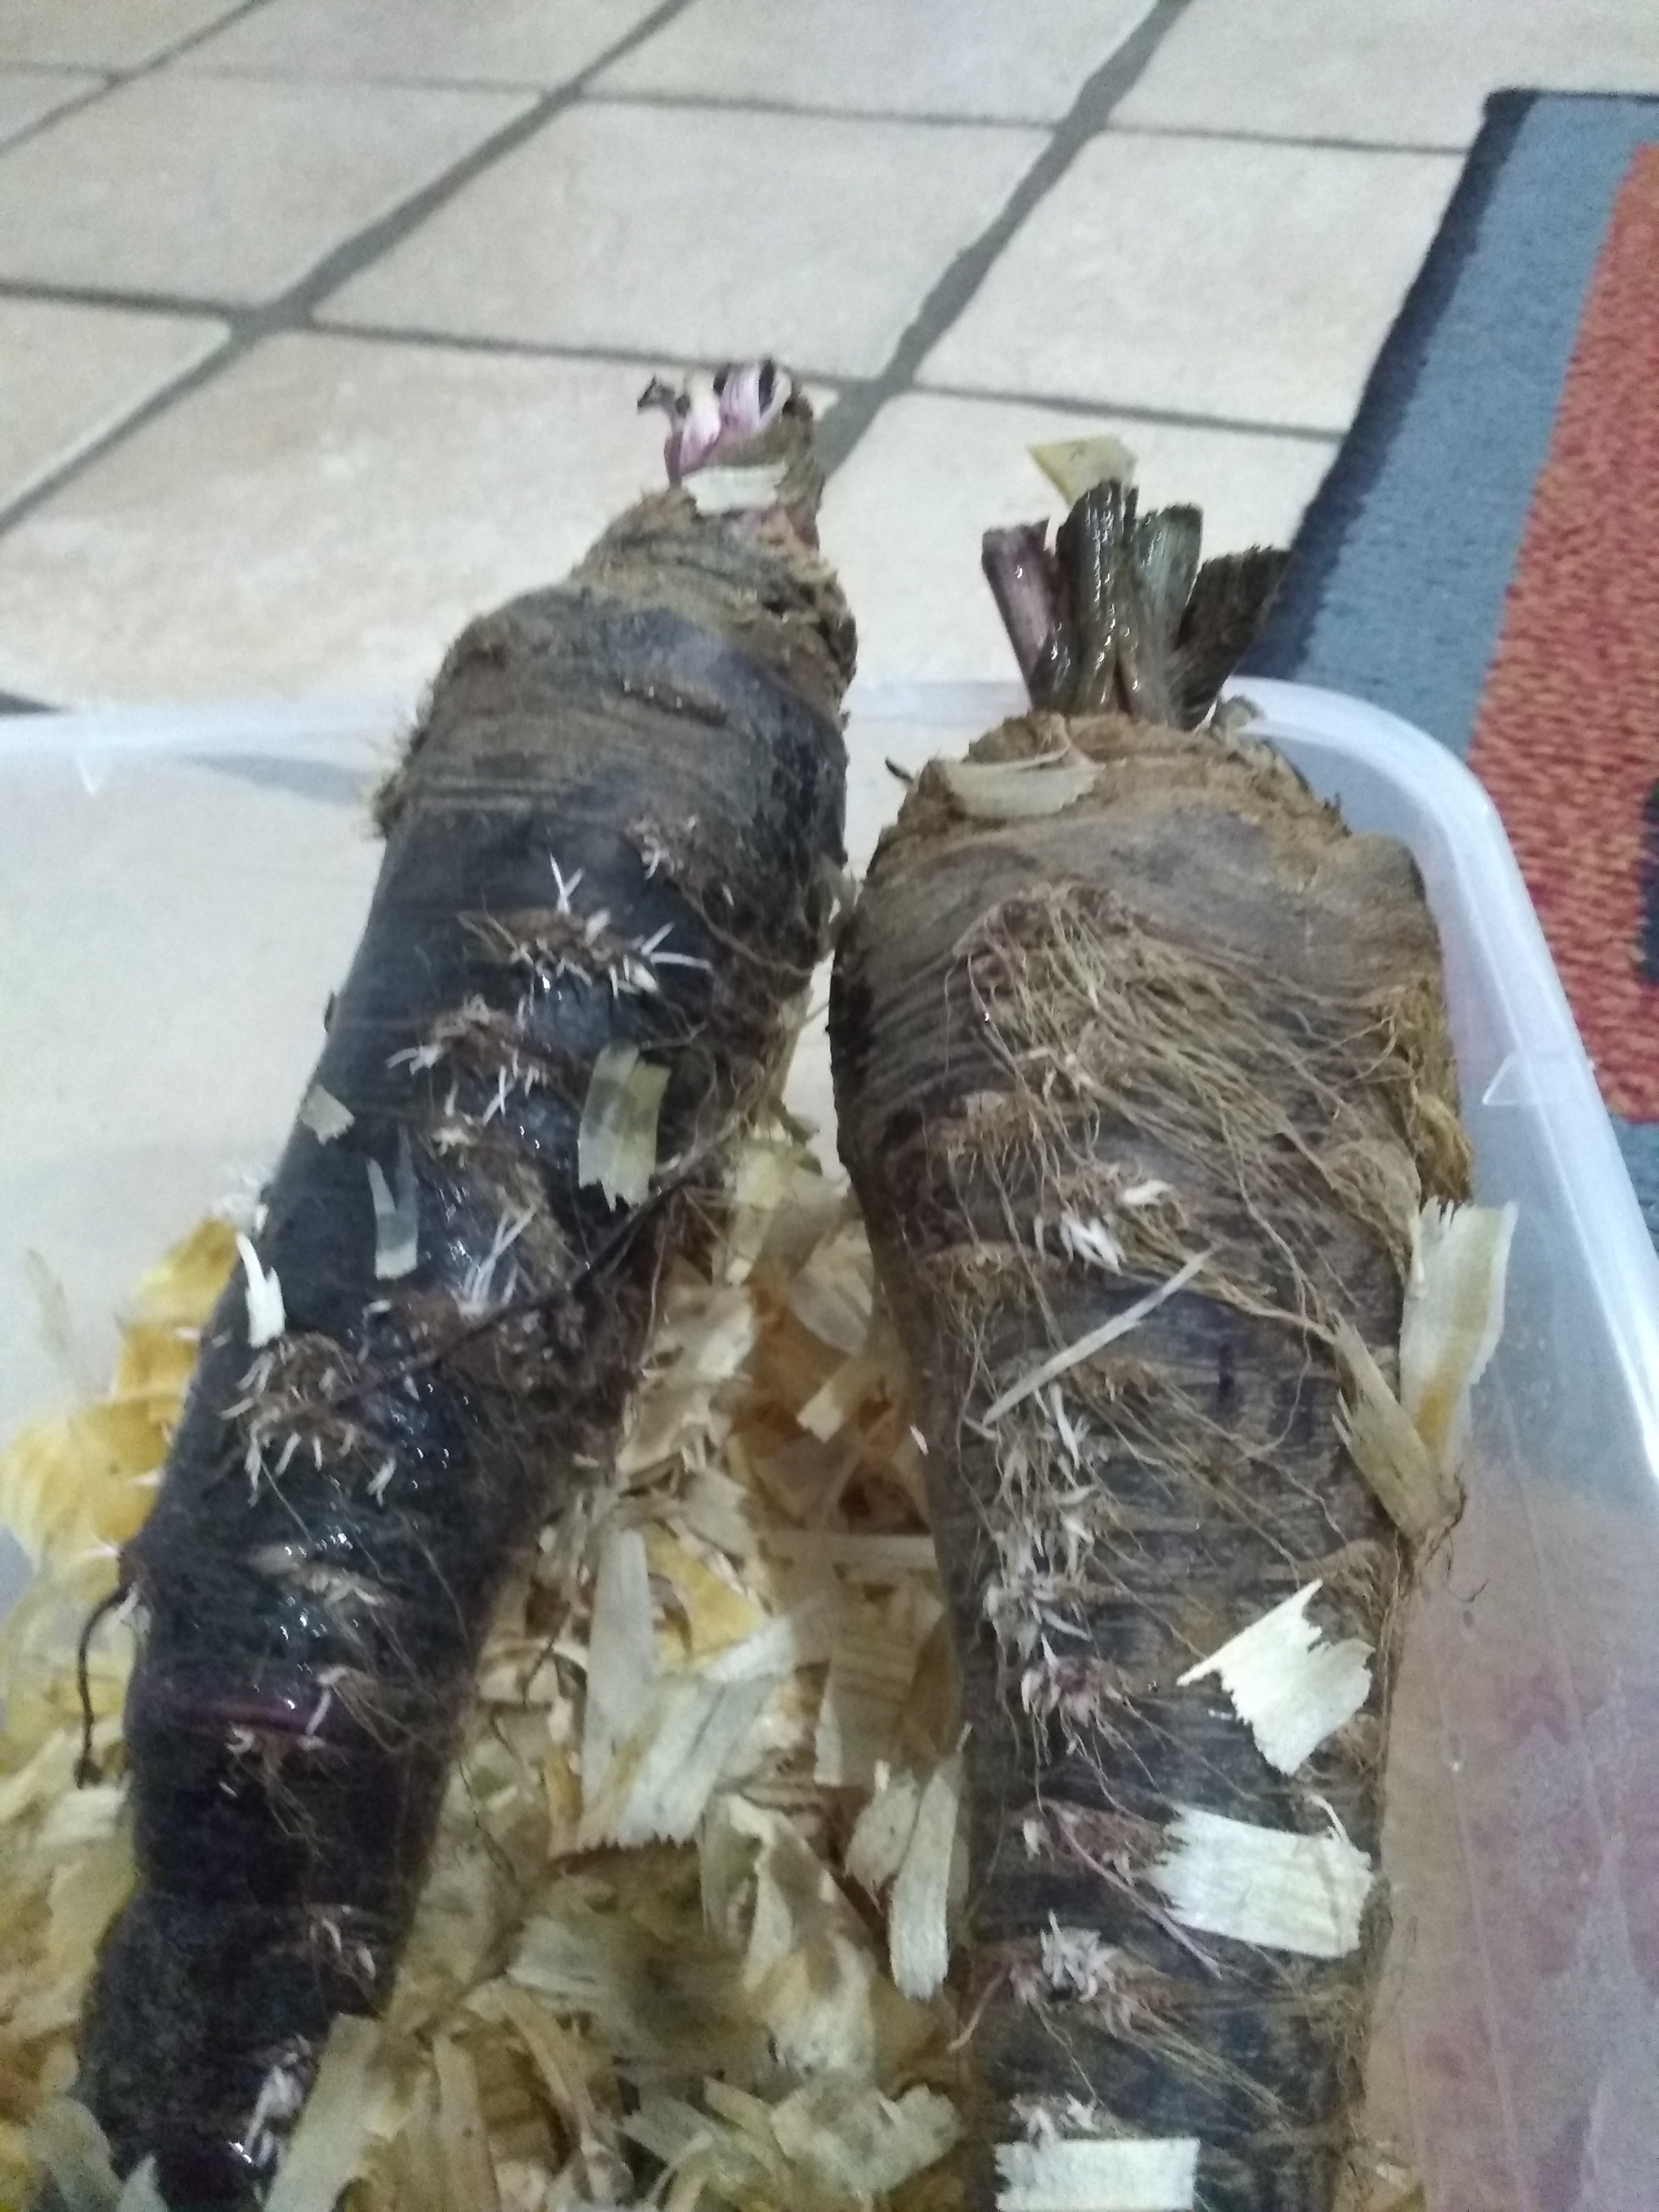
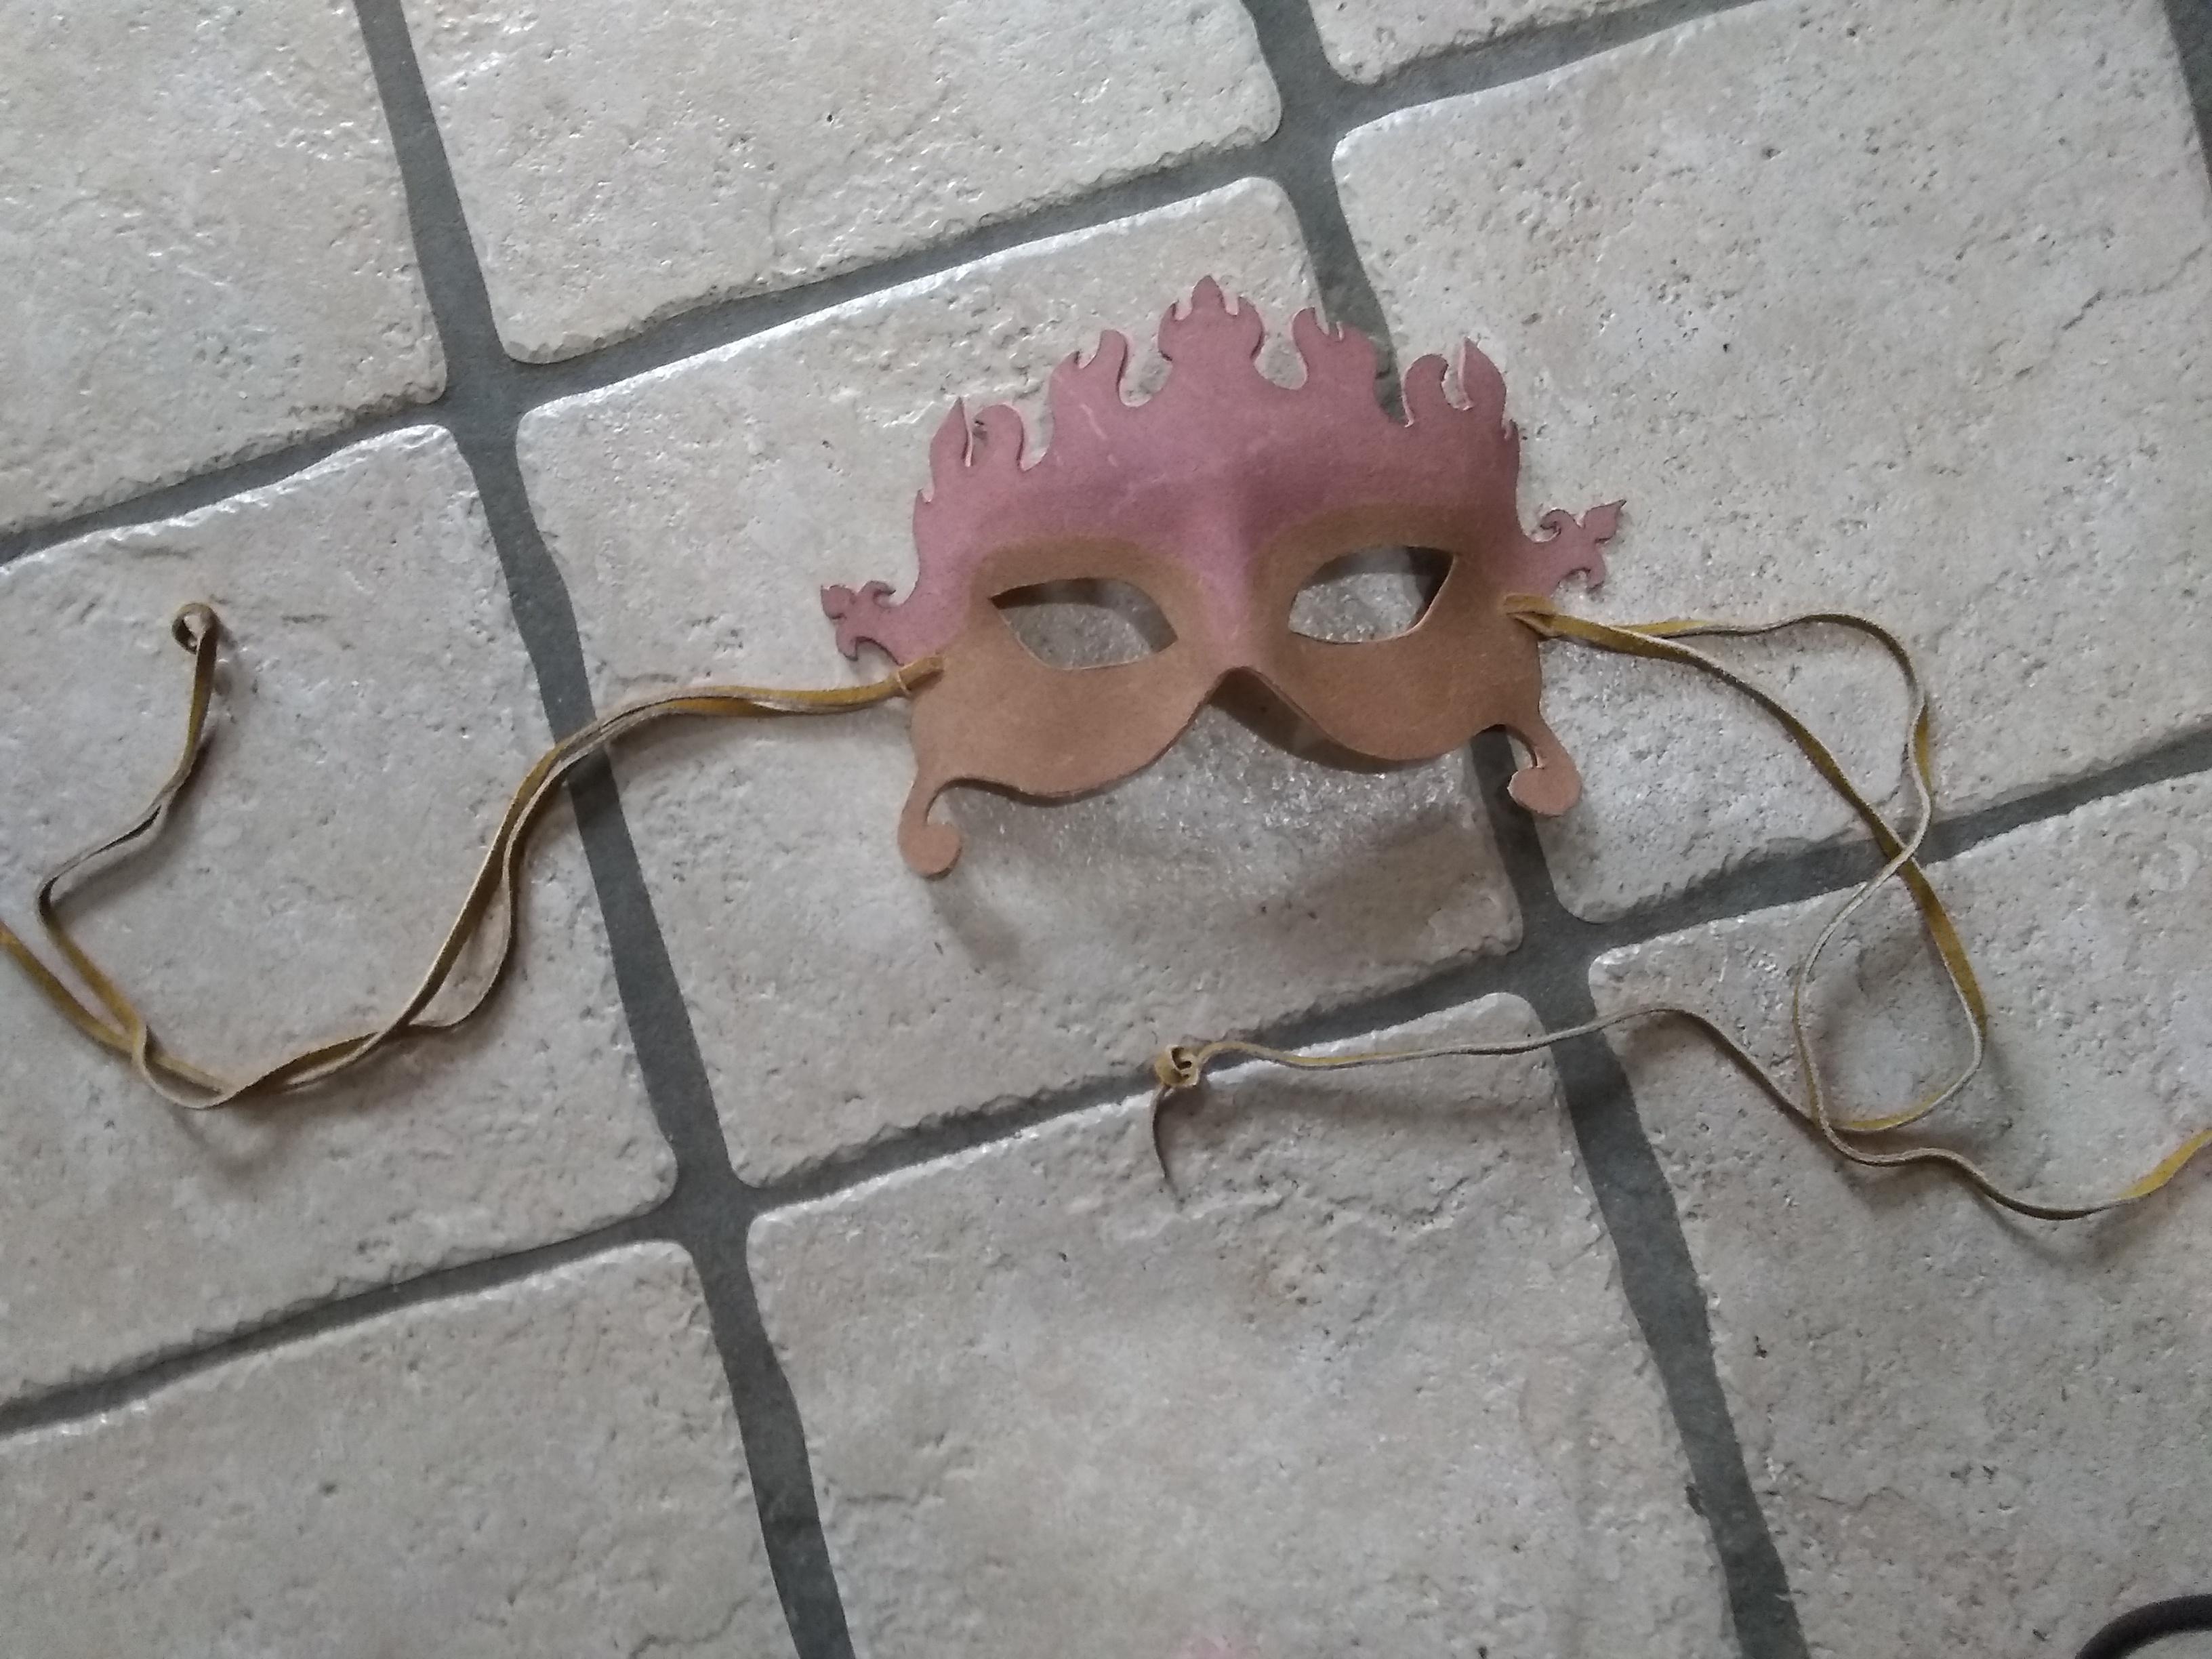
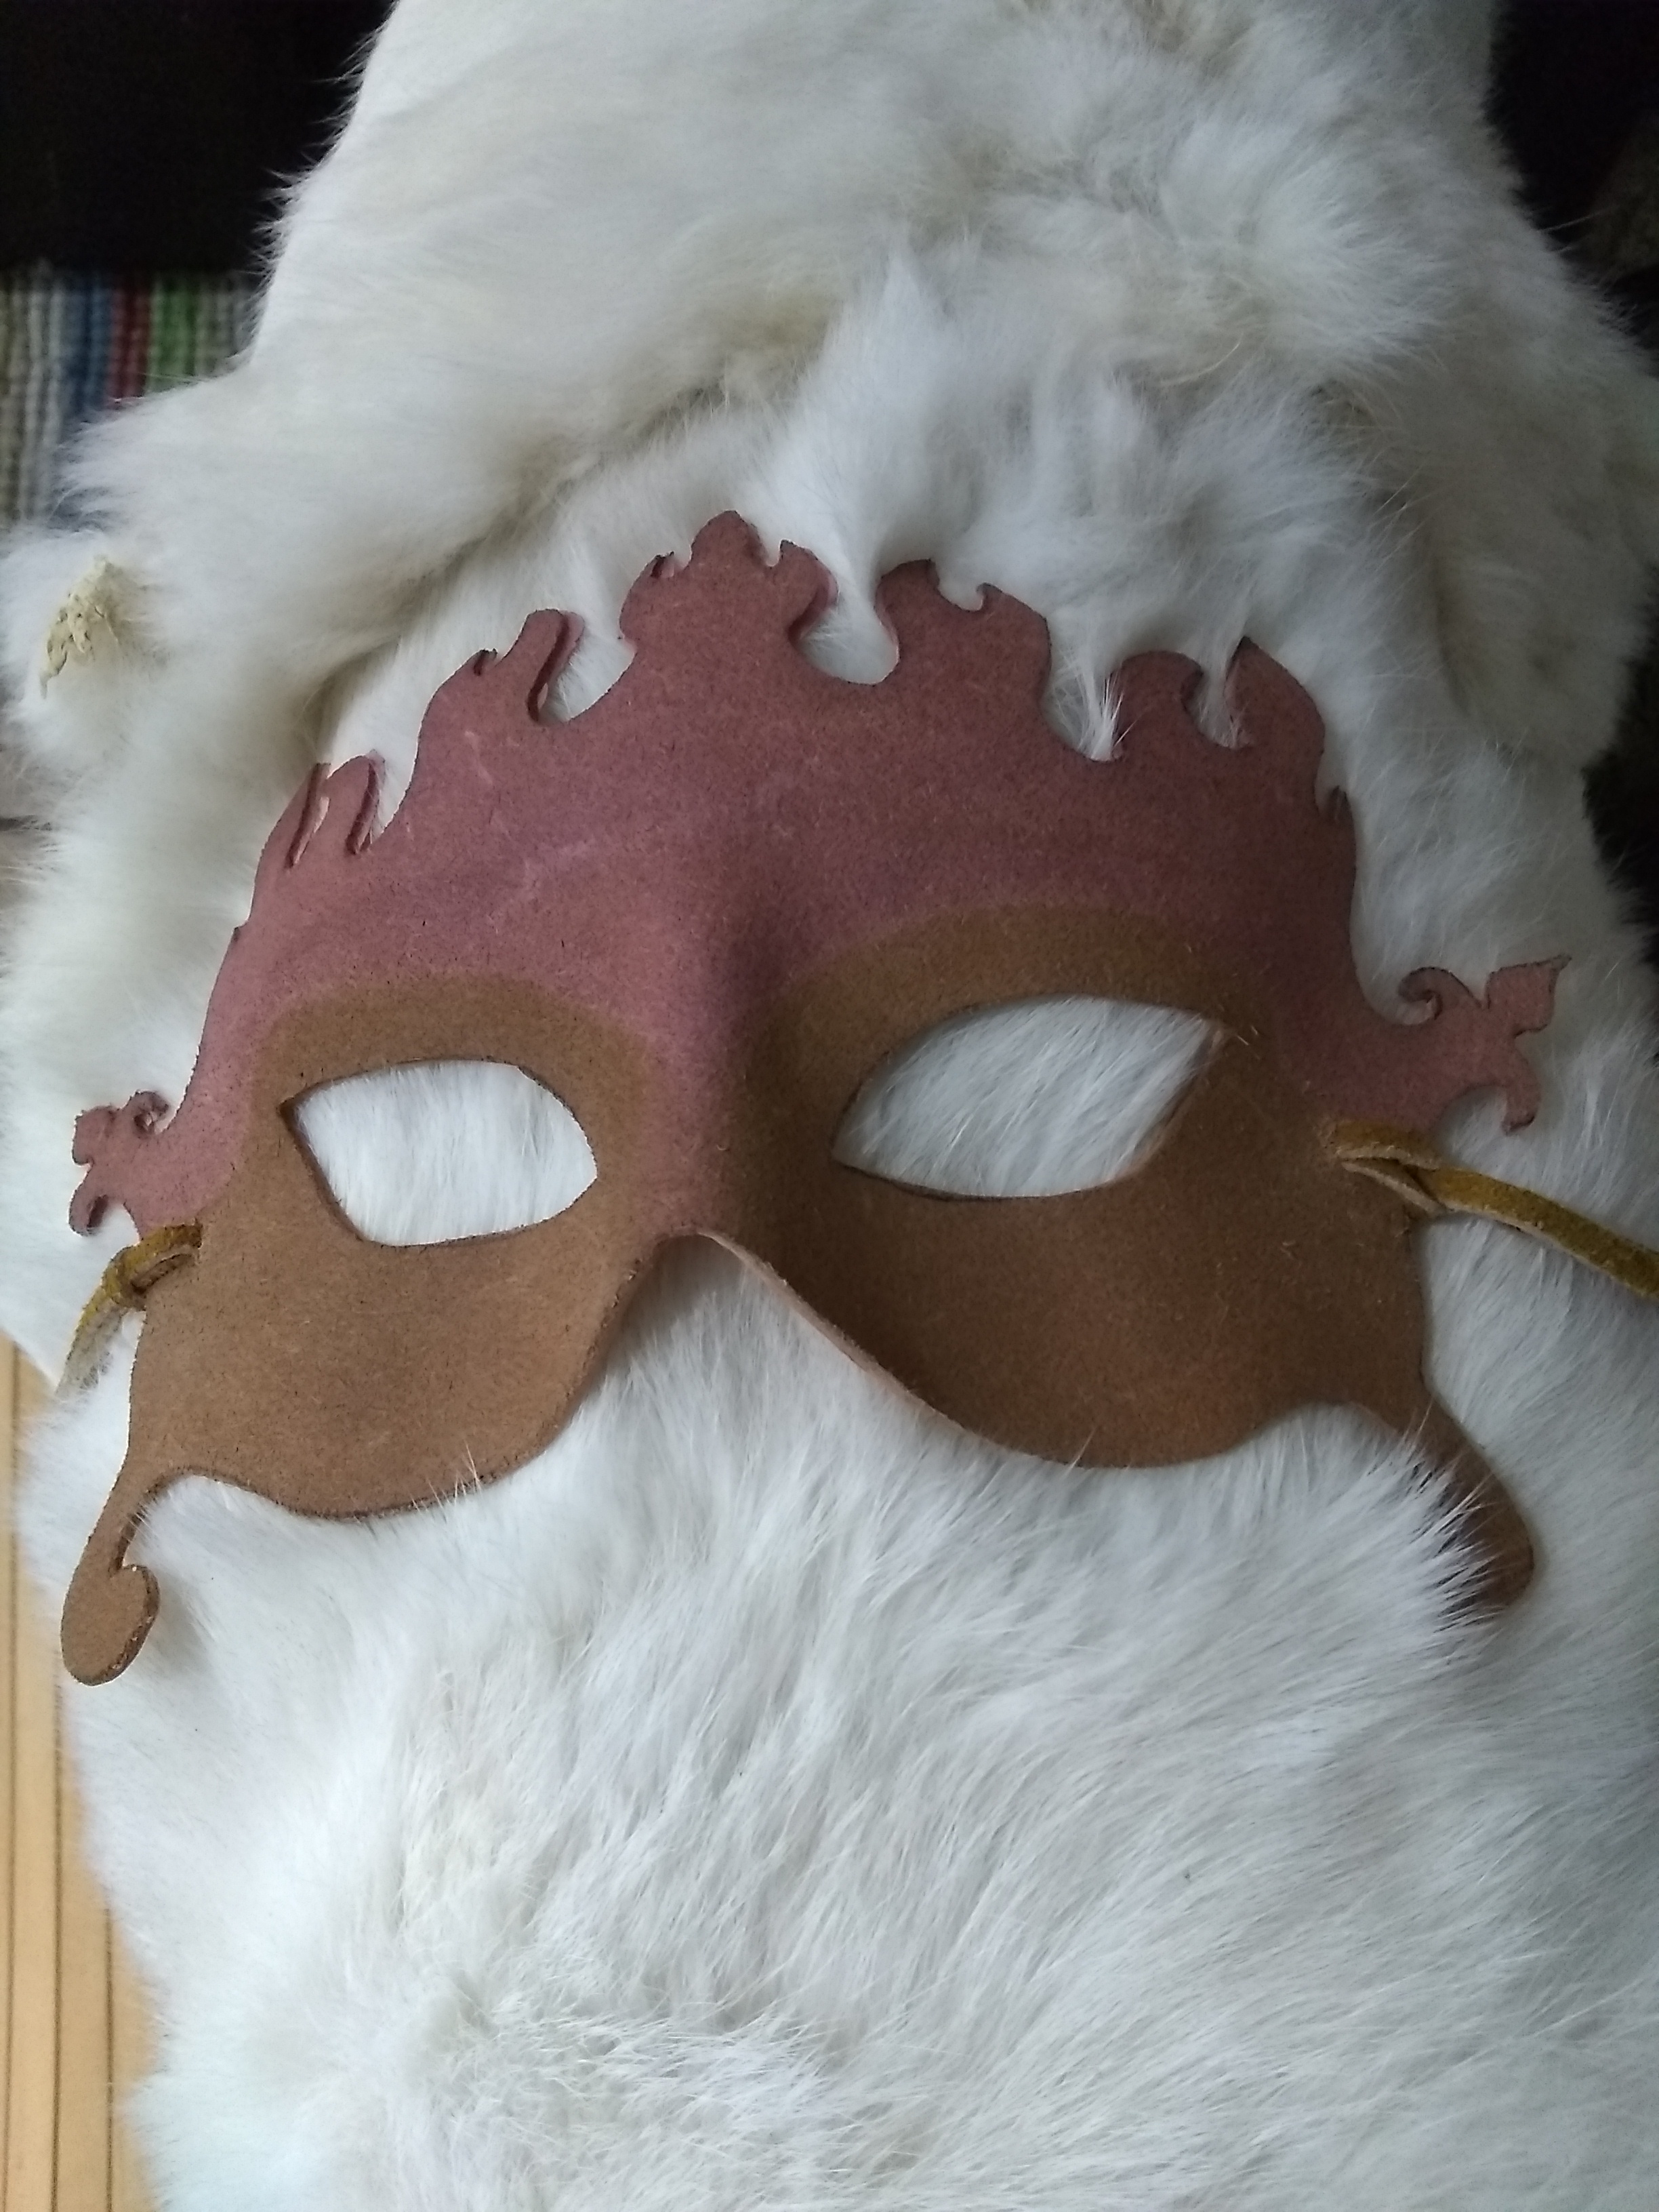
This project was finishing a leather mask I started at 12th night. I had cut the general shape and eye holes at the event, then moulded the shape to my face a few weeks later. I hadn't decided what to do with it and so it had stayed as is for months. I decided to pick it up again for the bean count, and since I've always had an interest in dyes and two on hand that I'd created, decided to try them out. The top half is dyed with purple Pusa Asita and Black Nebula carrot dye. The bottom half is dyed brown with a black walnut hull ink/dye.
The dyes were painted onto the mask using a paintbrush. After everything had dried I punched holes in the sides and threaded through repurposed leather ties to finish.
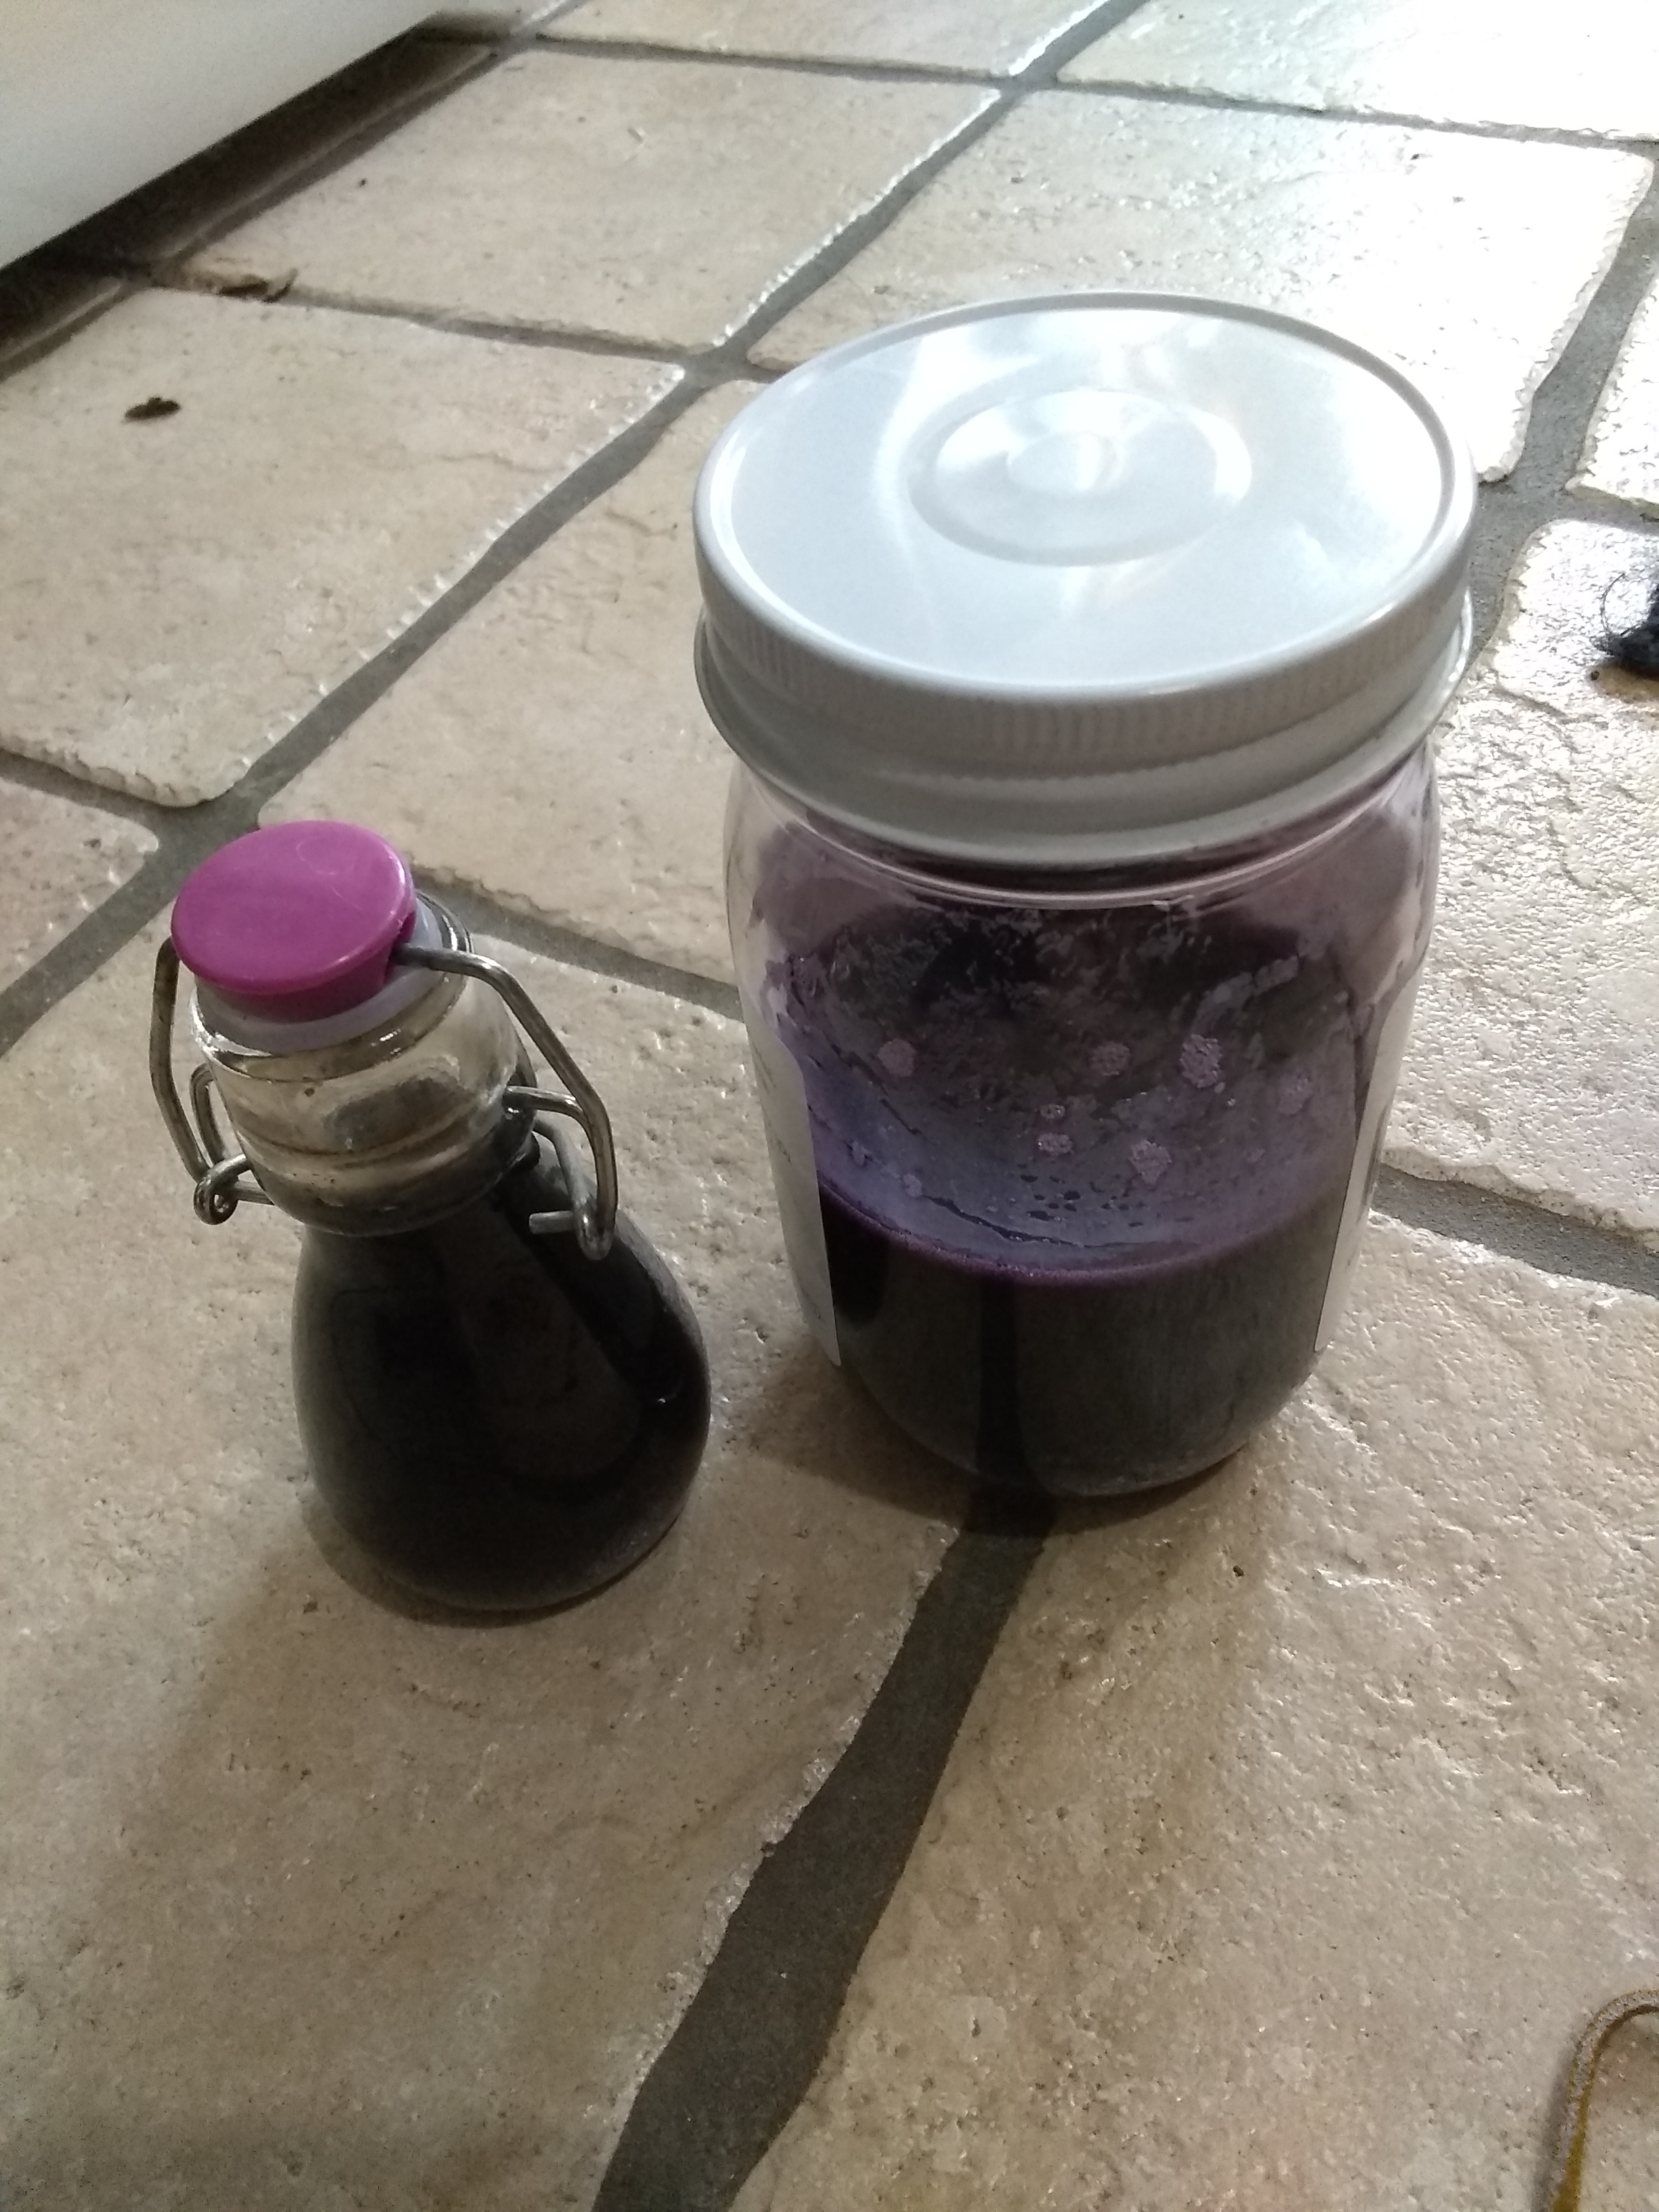
Black walnut ink was made by separating the hulls from the nuts, with enough water added to cover. I brought the hulls to a boil and then lowered back to a simmer for three hours. I occasionally stirred and smashed the mixture with a straining spoon to extract as much juice as possible. After three hours I lined a colander with cloth and poured the mixture through to another smaller pot, squeezing the pulp in the cloth to extract extra liquid. This then went back into the stove for three more hours to concentrate the pigment. After it was given time to cool, I poured the ink into several containers and added a small amount of alcohol to stabilize.
The carrot dye was made in a similar fashion. I took the scraps and peelings from my dinner prep, covered them with a small amount of water, and simmered for an hour until the solids formed a pulp that could be easily crushed with the spoon. After pulverizing as much as possible, I poured the mixture through the sieve lined with cloth and squeezed the last of the liquid from the pulp. I did not put this back on the stove since I was satisfied with the color and had a much smaller amount to work with. This solution had been stored in the fridge for expiramenting on fabric. (I'm new to processing this dye for fabric and still need to do more research before using it in this way)